
Watercolor Brushstrokes to Learn & Practice
Disclosure: This post may contain affiliate links, meaning, at no additional cost to you, I will earn a commission if you choose to click through and make a purchase.

In today’s post, I will be sharing with you the brush strokes that I feel every watercolorist should learn and practice. Whether you are a beginner or have been using watercolor for years, these basic brushstrokes are so important for anyone who is looking to gain more confidence and skill within their watercolor journey.
Materials Needed:
-Round Watercolor Brush (I am using a Princeton Aqua Elite Round Brush in a size 8)
-Coldpress Watercolor Paper (using Canson)
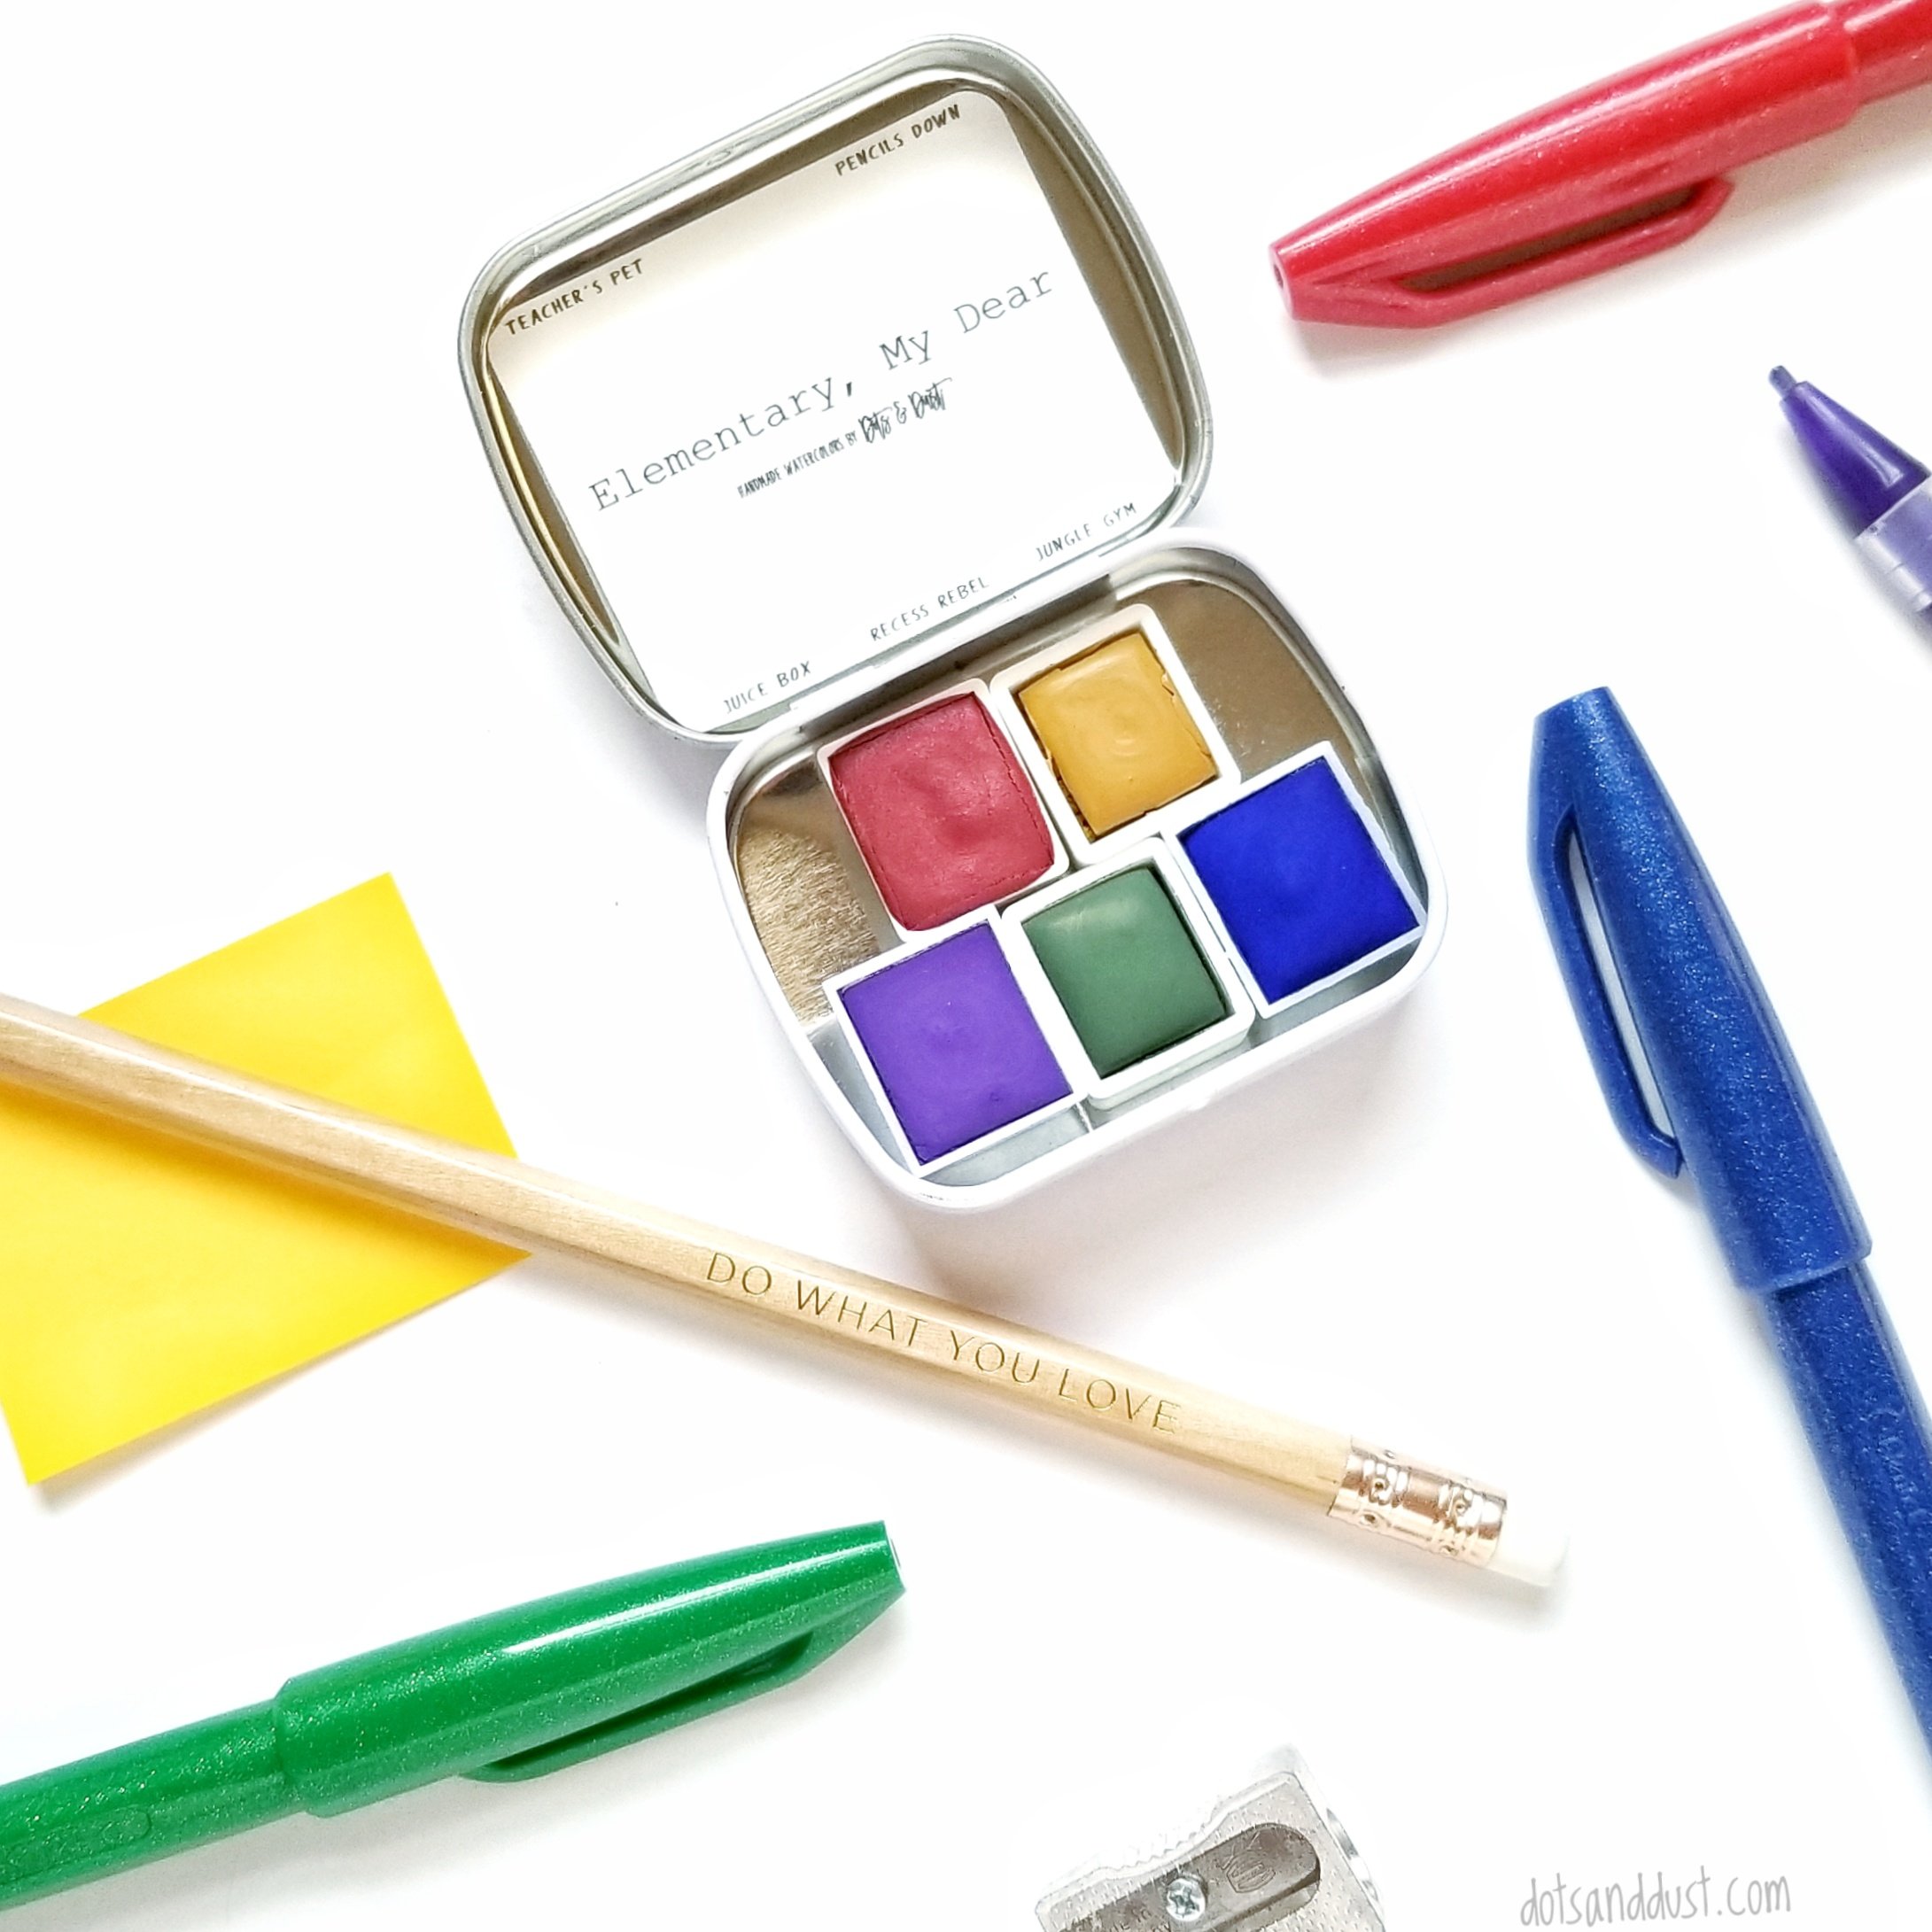
-Watercolor Paint (using Dots & Dust color “Jungle Gym”)
-Jar of water
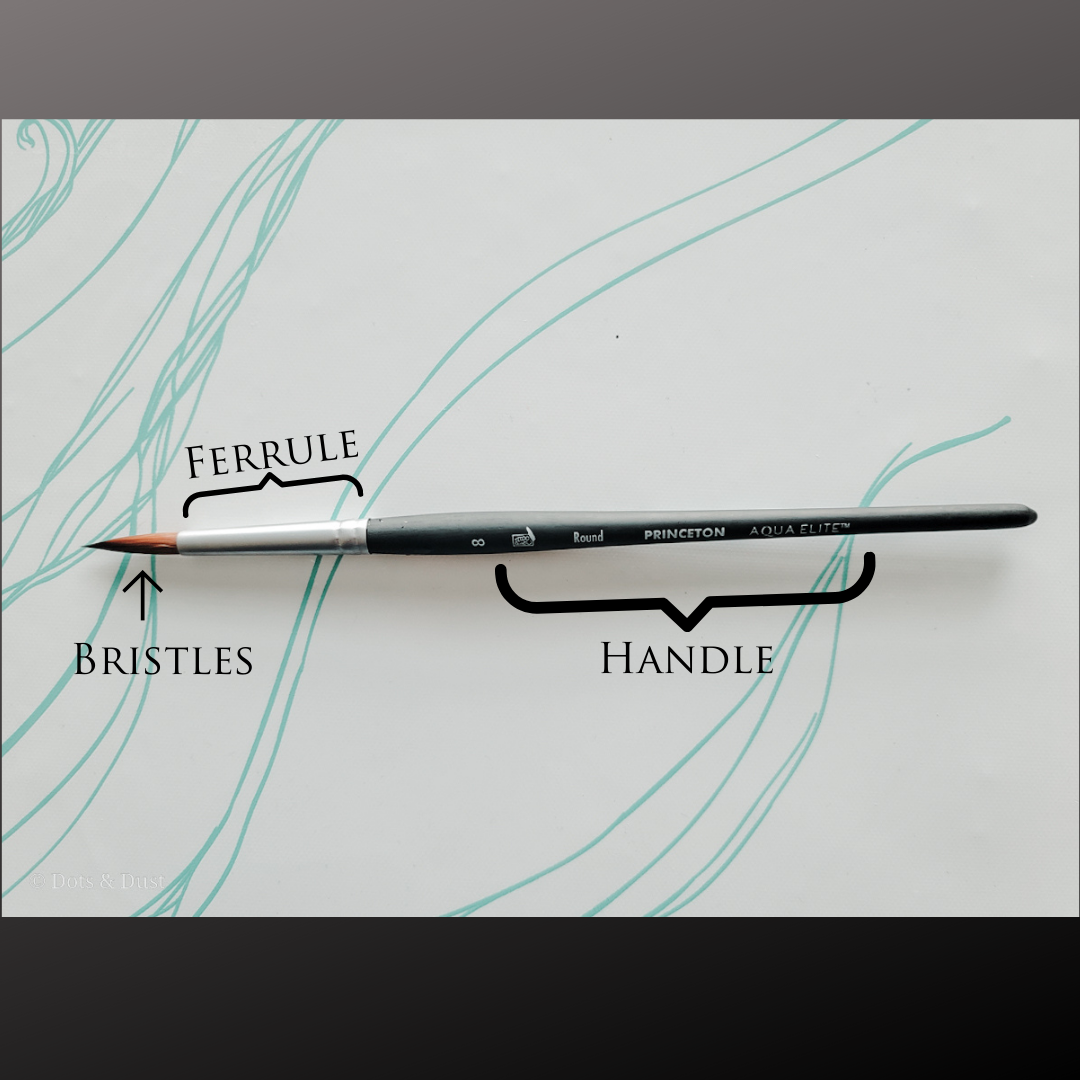
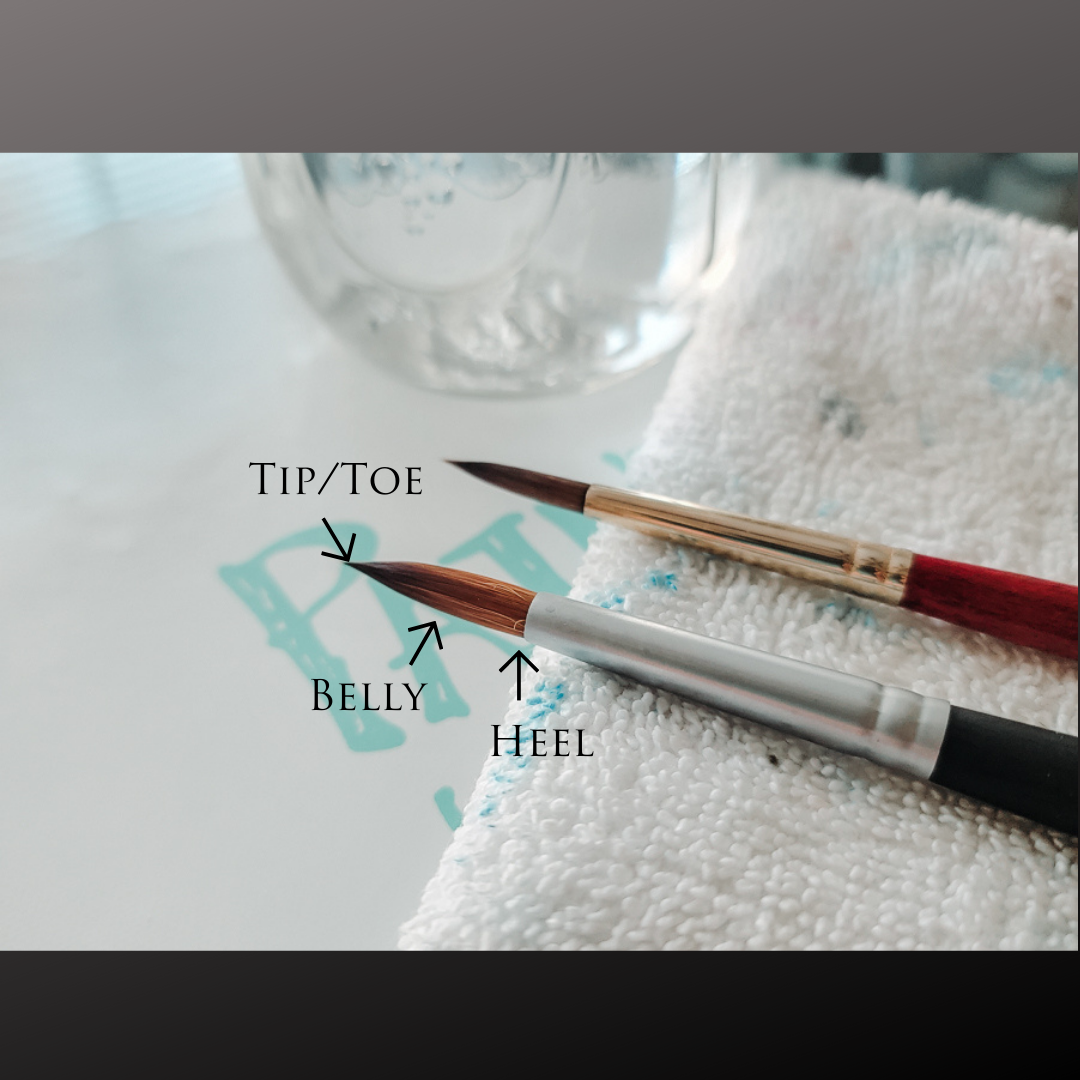
Before we dive into the different brushstrokes, it is important to familiarize yourself with the anatomy of a brush and how to hold it properly in your hands.
A paintbrush is made up of the handle, ferrule, and bristles. Also take note of the different parts of the bristles: the heel, the belly, and the toe/tip.
When holding your brush, grasp it in the same way you would naturally hold a pencil in your hand. Every individual is different, but you just want to make sure your hand and wrist are relaxed and comfortable. Understand that the further down your hand is on the handle and the closer to the ferrule you are, the more control you will have on each of your strokes. If you are painting big, loose strokes (like for a background of a landscape painting), then it may be better to move your hand up higher on the handle and further away from the ferrule.

Okay, let’s load up our paintbrushes and start painting!
You can read through each brushstroke section below or for my visual learners (I got you! 😉), click the button to jump down to the video:
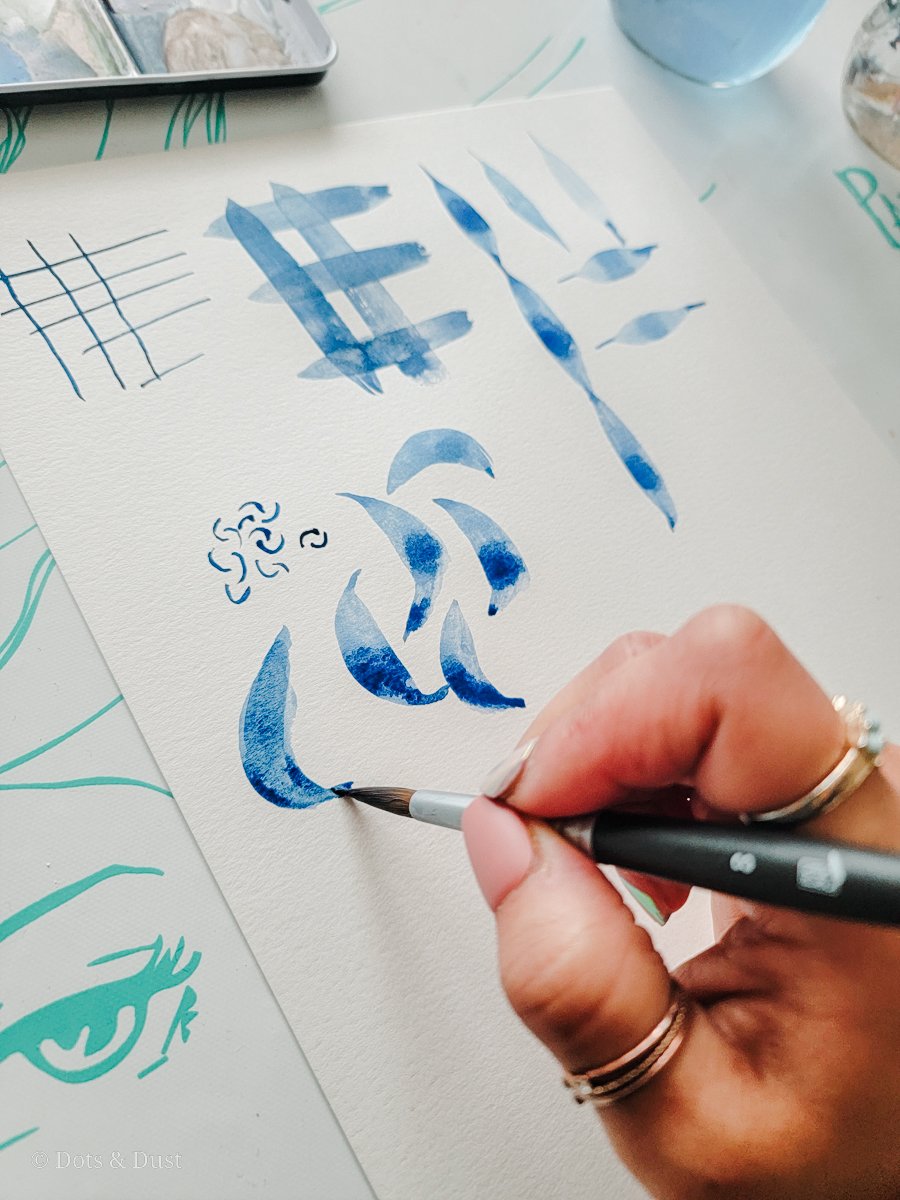
Thin lines

Let’s start with very thin lines. For these strokes, you want to make sure you are holding your brush perpendicular (90 degrees) to your paper. Using the very tip of your brush and with little to no pressure at all, drag your bristles across. Be sure to keep your wrist very still and move your entire arm across with your elbow anchored down on your desk/surface. Pivoting from the elbow and refraining from any wrist movement will help your lines be as thin and crisp as possible.
Practice making your lines go both horizontally and vertically.
Thick lines

For thicker lines, we are going to apply a lot more pressure to the bristles. Holding your brush at a 70° angle, press down on your brush and drag it across your paper. This stroke can help you see just how thick of a line you can make with the brush size that you have chosen.
Compound strokes (Thin to Thick)
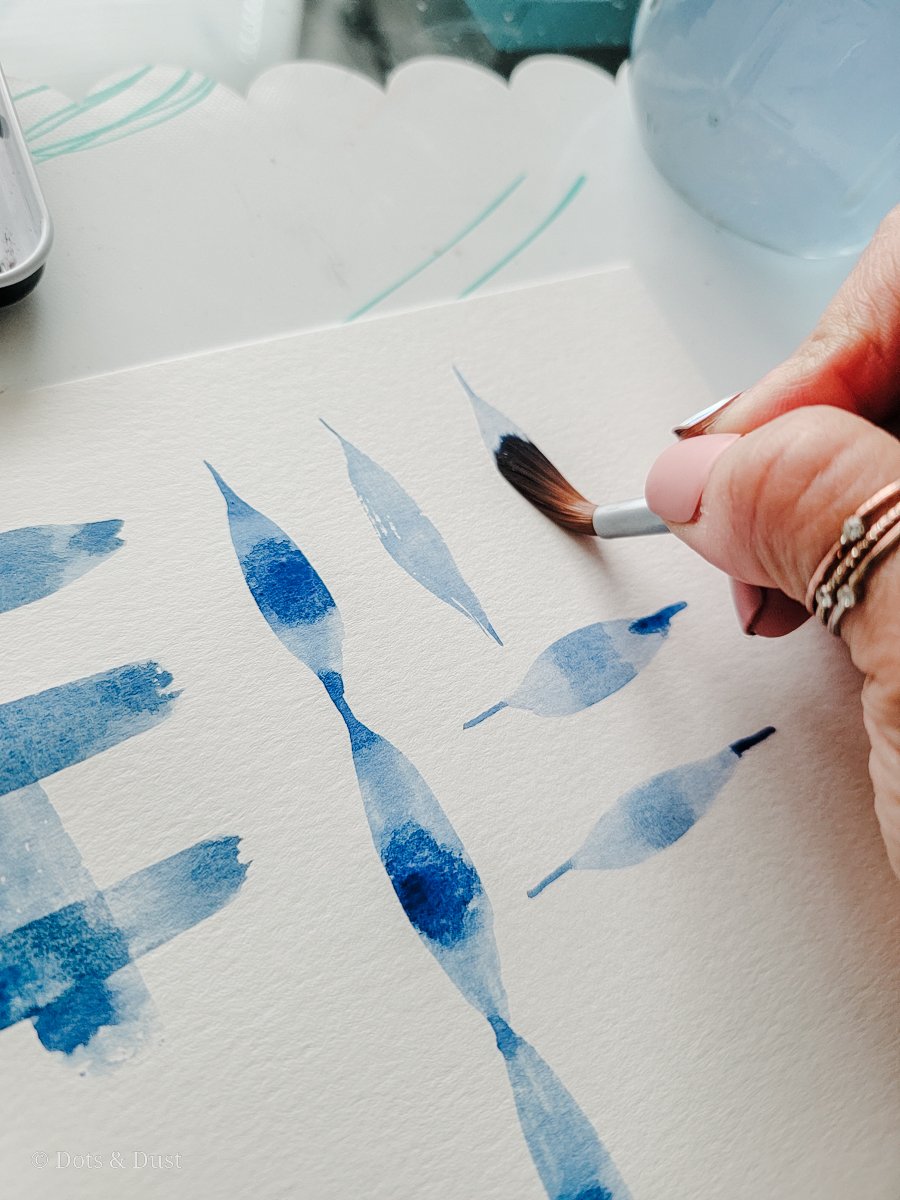
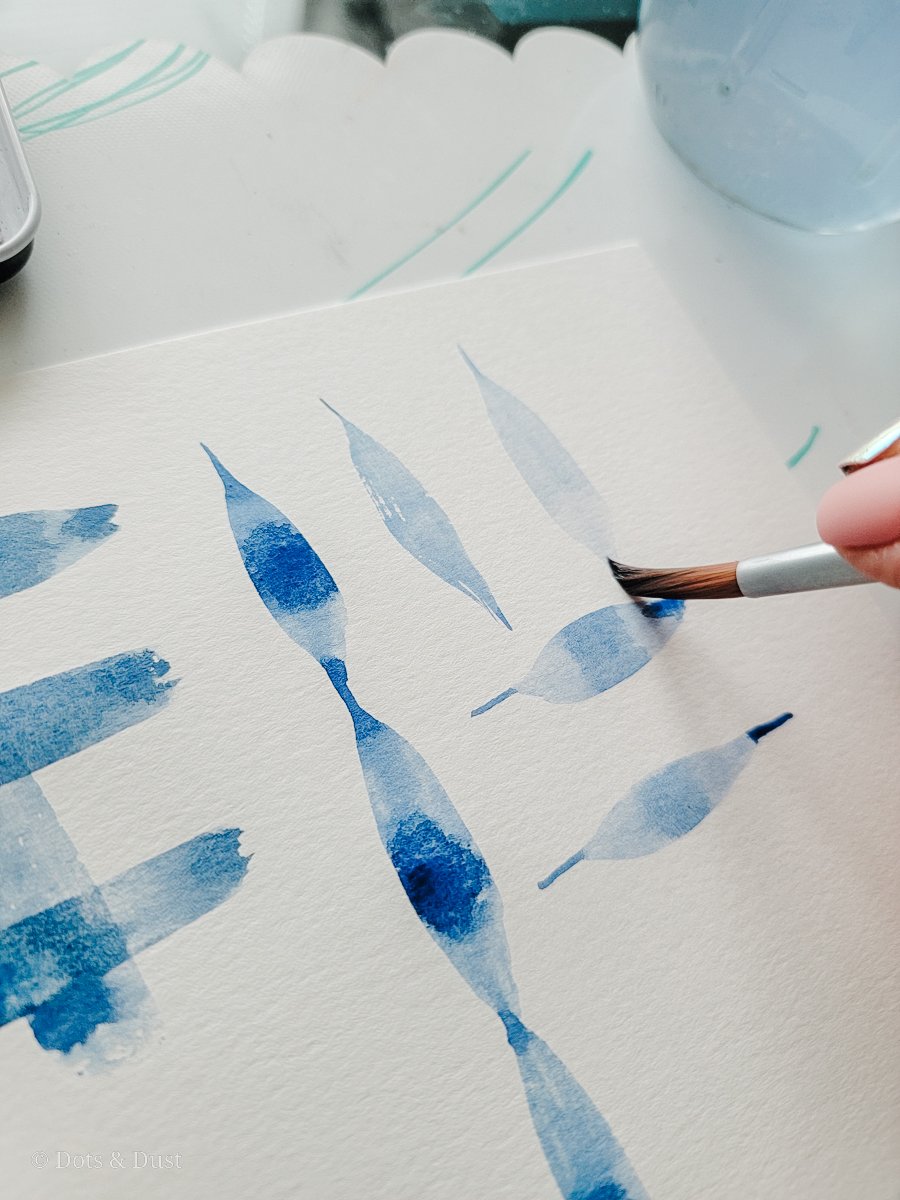
Now, let’s practice putting these two strokes that we just learned together into one compound stroke. Starting with your brush at a 45 to 50° angle, apply little to no pressure on the bristles making a thin line coming down towards you on the paper. And then gradually add pressure to fan out the bristles to make a thicker line and then slowly let off the pressure to come back to a thin line again.
These compound strokes are VITAL to learning how to paint watercolor leaves and I practice these almost daily.
C Curves (small and large)

If you want to learn how to paint watercolor roses with ease, practicing these c curves will become your new best friend.
For the small c curves, hold your brush perpendicular to your page, and very lightly paint these small c’s with the tip of your brush. Remember to use little to no pressure for these to make sure that they are small, thin, and tight.
Painting larger c curves are very similar to the previous compound (thin to thick) strokes. But this time instead of going straight across, you are going to curve them around into a c shape. So hold your brush at a 45° angle, apply little pressure to drag out a small line, gradually apply more pressure, and then release the pressure coming back to the thin line. This will create a much thicker c curve.
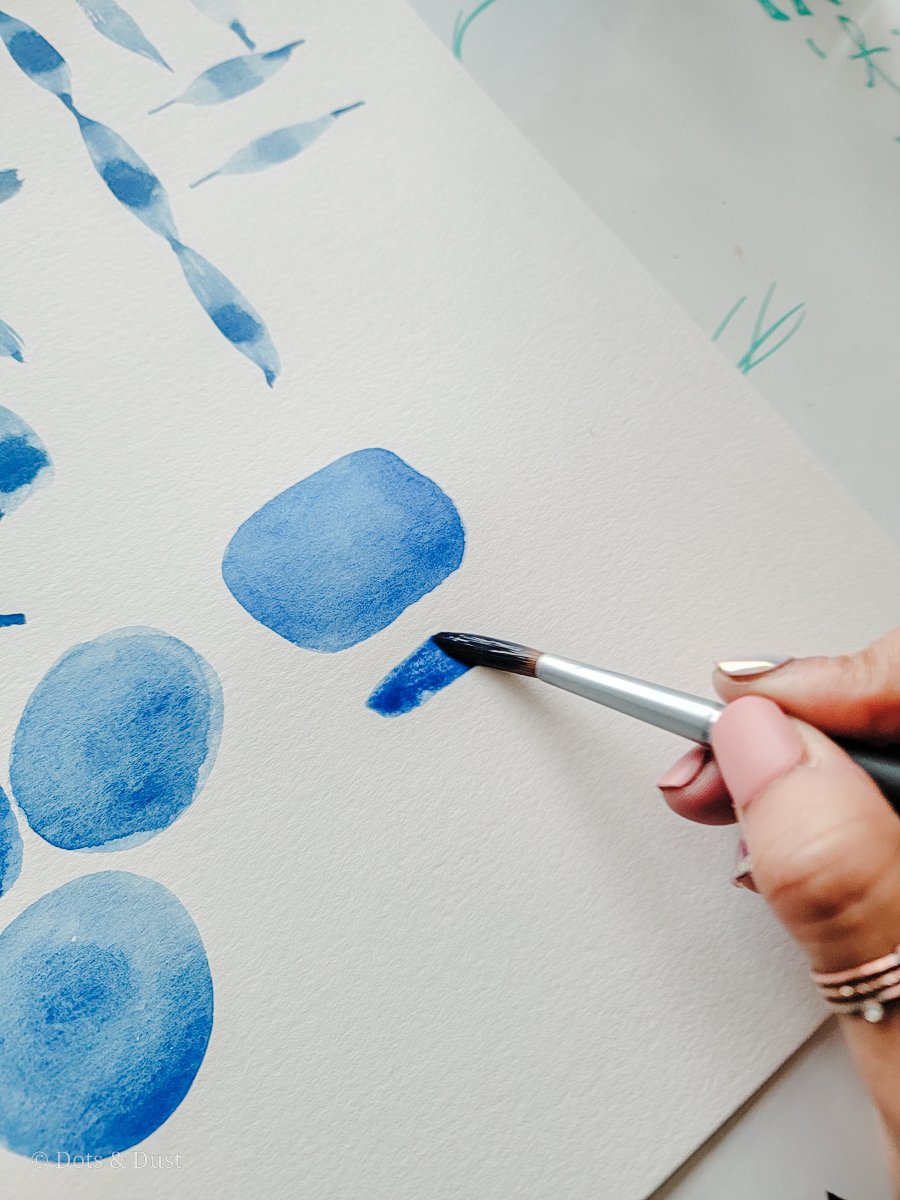
Circles

Circles are great to warm up your wrist and to see the flexibility range of your bristles. Start by just holding your brush like you normally would a pencil, press down with pressure as you swirl around to make the circle, gradually releasing pressure as you close out the shape. Continue to swirl the belly of the bristles to fill in and shape the rest of your circle until you are happy with it. For this method, you are keeping your wrist pretty still and letting your whole arm move with your brush.
Another way you can make a circle is by holding the brush more vertical and letting your wrist do all the work. For this method, apply full pressure to the brush letting the bristles fan out, and then swirl your wrist around to scoop the bristles around making your circle. Again, fill in your circle completely using the belly of your brush.
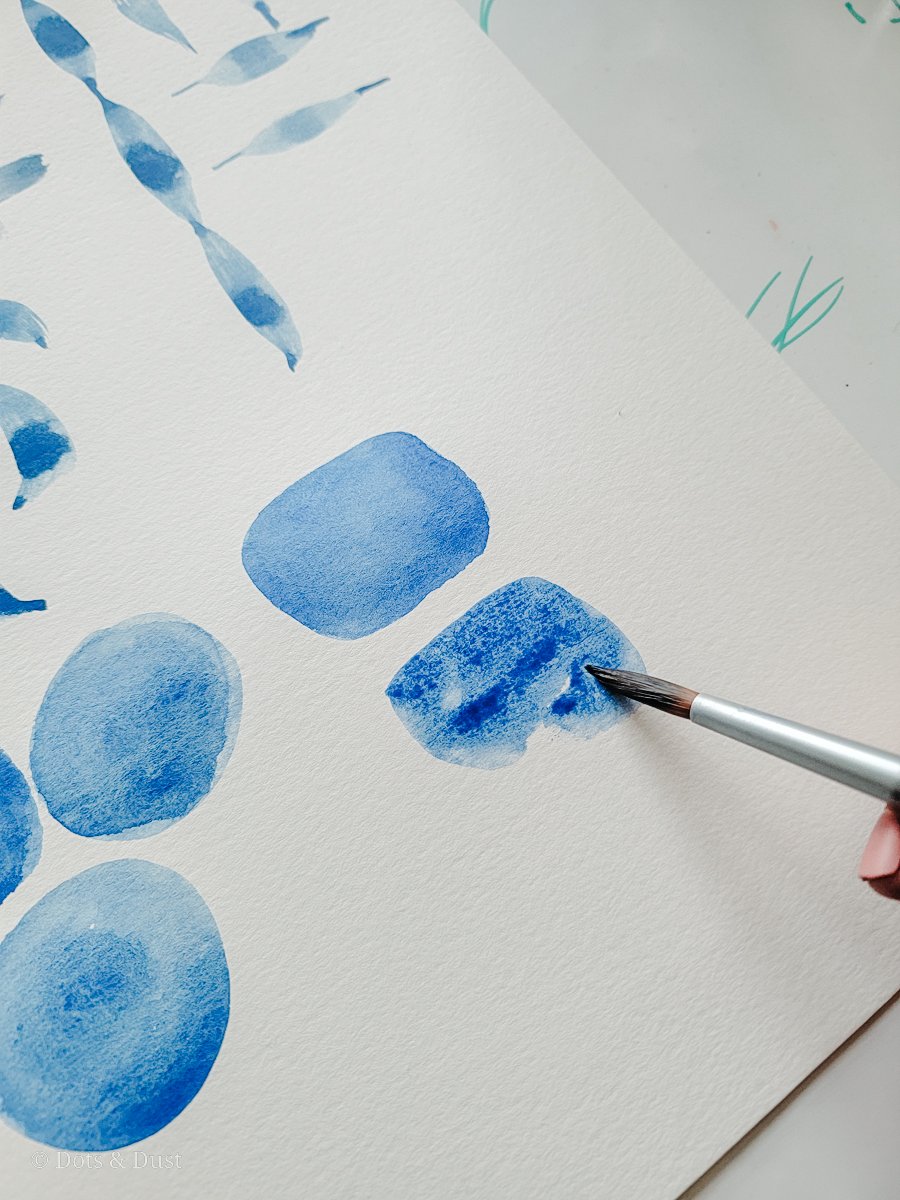
Flat Wash

Flat washes are great to create paint swatches or when you want a large area where no individual brush strokes are visible.
Load up your brush with paint and using the belly of your brush, paint side to side pulling the pigment and water down. You want to work quickly while your paint is wet to make sure everything looks even and that there are no visible stroke lines.

Smooth Gradient (Grade A Wash)

Creating smooth gradients (moving from the darkest to the lightest value of a hue) is a skill that is used frequently in landscape paintings. To create a Grade A wash, start with a large pigment to water ratio on your brush. You want this first swatch to be the darkest value of your chosen hue (color). Using the belly, move your brush from side to side to create that dark swatch on your paper.
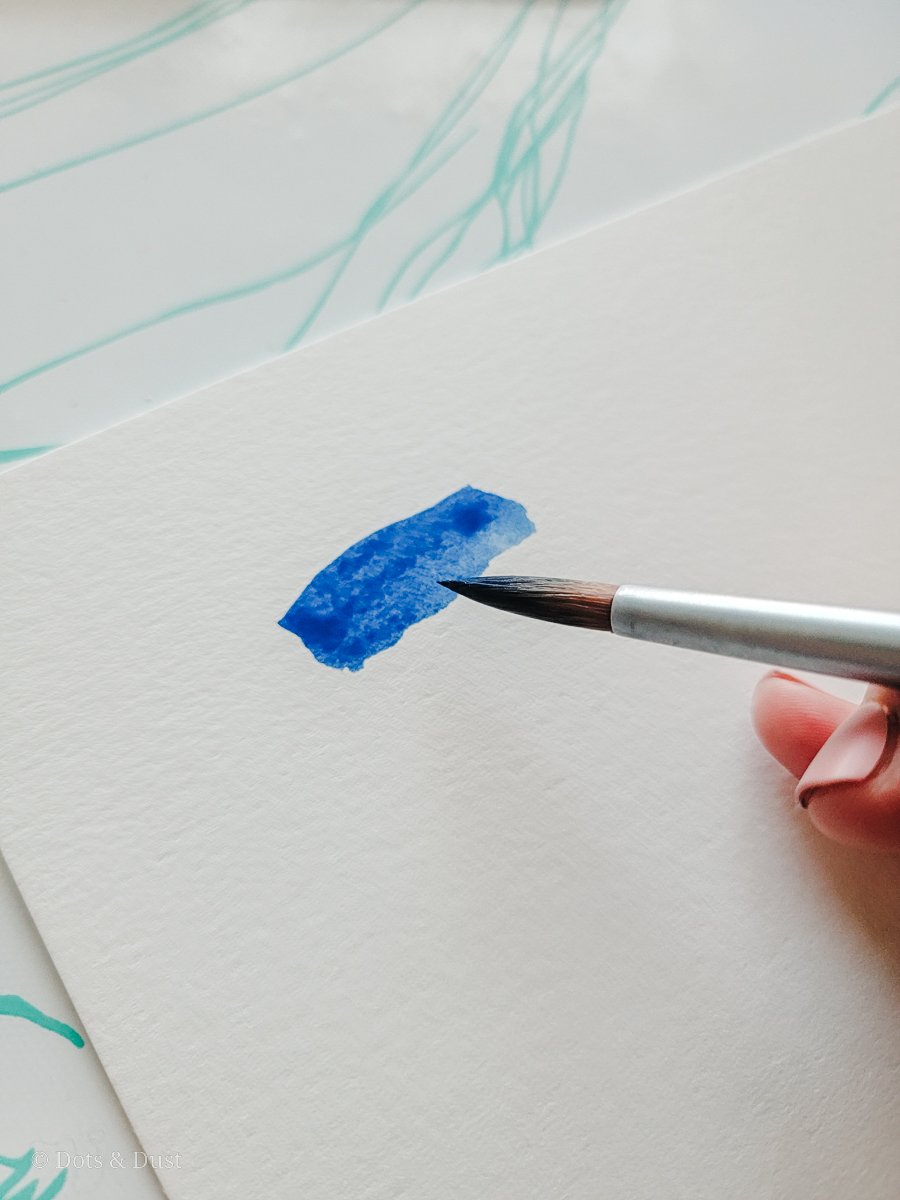
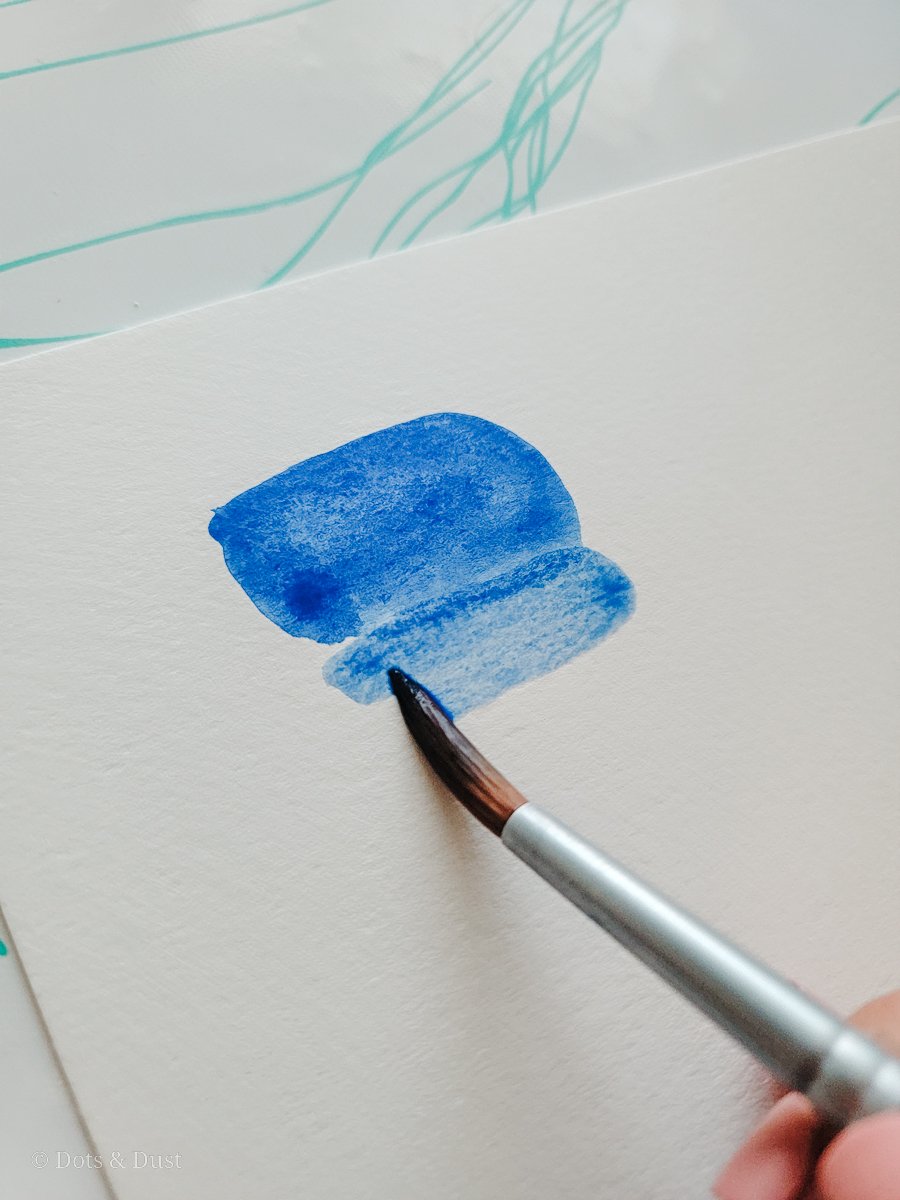
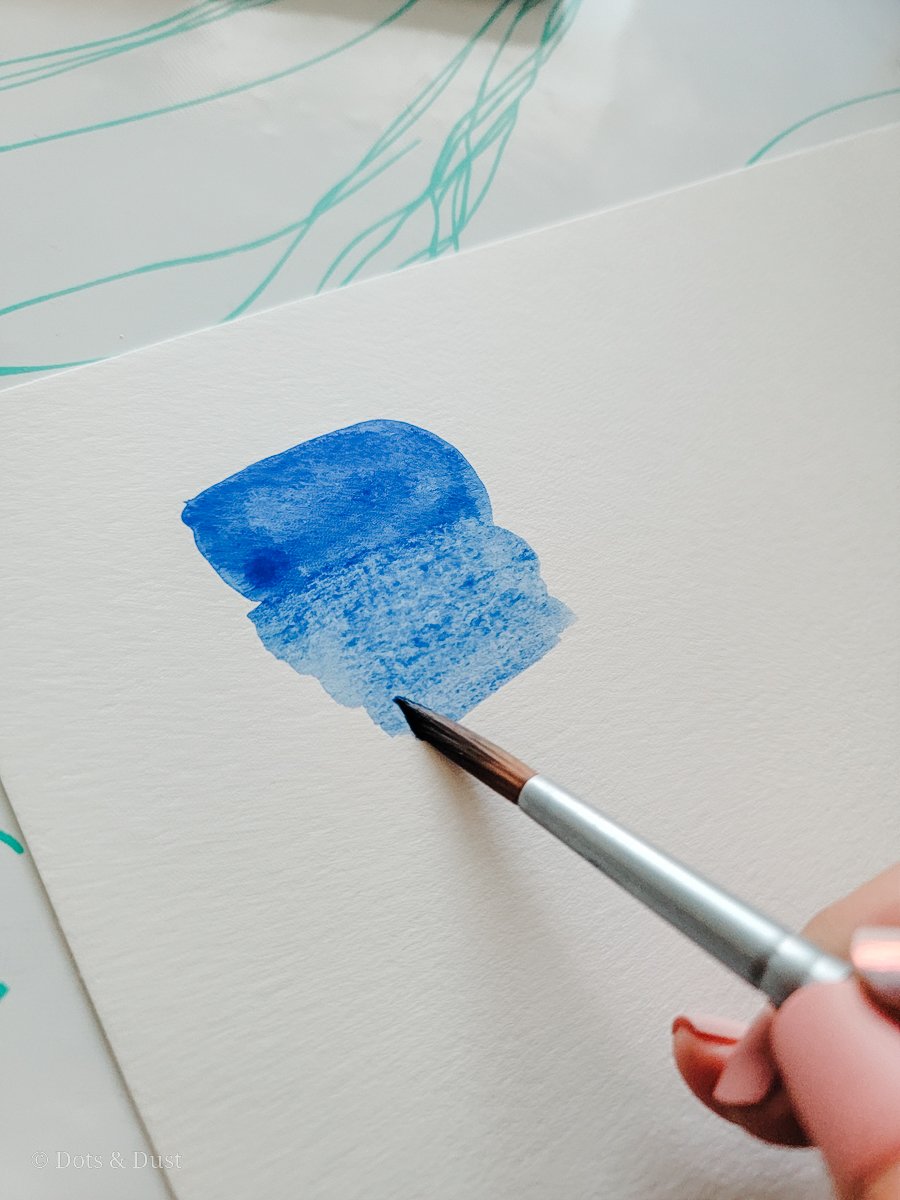

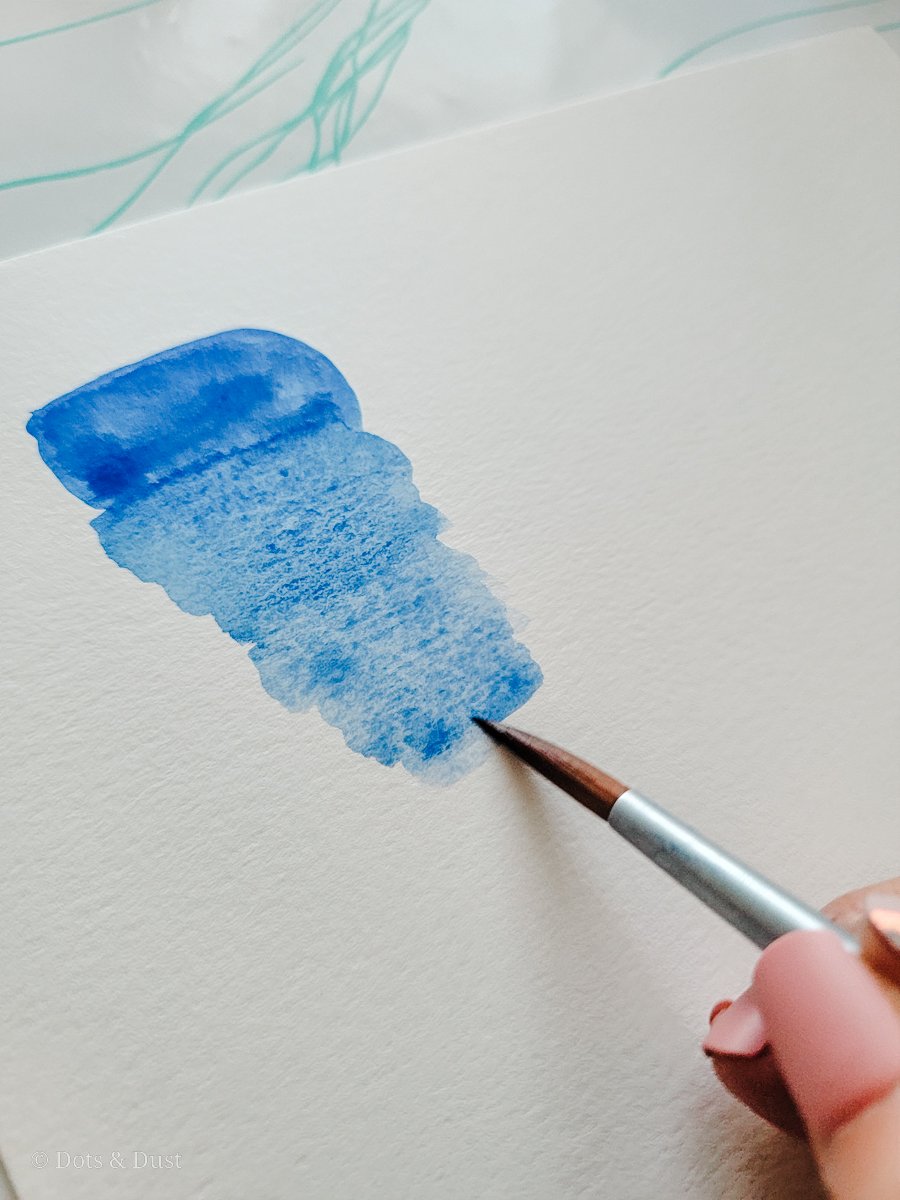
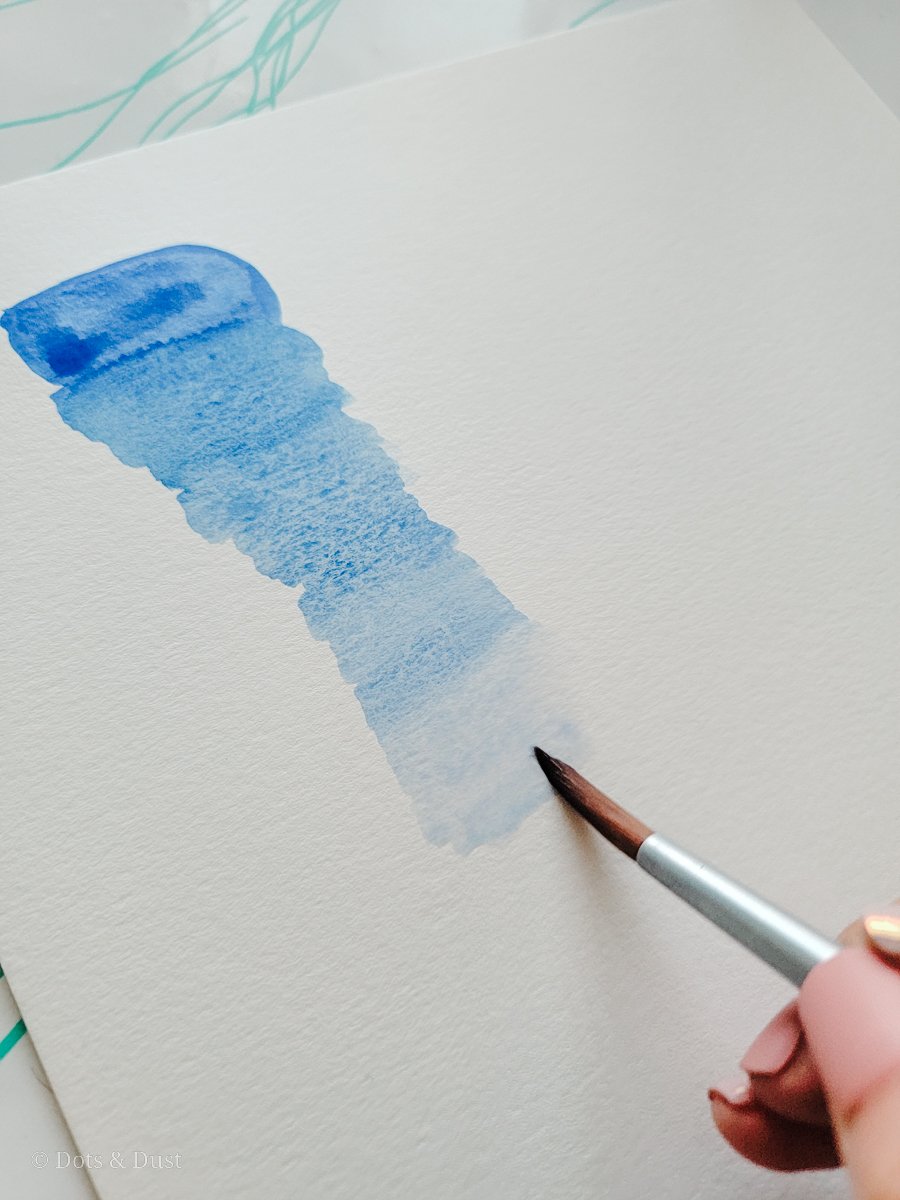
Before the edge of that first swatch dries, quickly dip your brush into a jar of water and swirl a bit to release some pigment into the jar. Swipe the bristles on the edge of your jar to remove some water (you never want your brush dripping wet), and then paint a lighter swatch touching the boundary of your previous one. Continue painting side to side and downward on your paper.
Repeat the steps of dipping your brush in water and painting right next to the previous swatch to lighten the hue until you achieve a beautifully smooth gradient of color. Keep in mind that every time you swirl your brush into your jar of water, you are gradually lightening the hue on your bristles. This is what helps achieve this Grade A wash.
And there you have it! All the important strokes that EVERY watercolorist should learn and practice (regardless of experience) to help keep their technique sharp and bring confidence to their practice.
I have also included this video of what each stroke looks like for those of you who are visual learners. Enjoy!

Comment below with which strokes are your favorite and if I missed any that should be added to the list!
Ready to try the smoothest & creamiest watercolor paints around?
Shop our handmade watercolor paint sets now!

Want to snag my favorite paint brushes & supplies?
Visit my Amazon Storefront!