Watercolor Mistakes You Want to Avoid
Mistakes. We all make them.
I know I have.
But my job as a watercolor educator is to help you break these nasty habits or prevent them from starting all together.
So let’s dive into what I consider my top ten watercolor mistakes that you should avoid at all costs.
Not taking care of your brushes

Take it from me.
You want to make sure you are taking care of your watercolor brushes on a daily basis. If you fail to do this one, your brushes will begin to lose their shape. And if you have a favorite round brush with a nice tip at the end of its bristles, nothing will bring more frustration than to have it no longer working at its peak condition.
Your brushes are the tools of your trade and, let’s be honest, are not on the cheap side. So if you want to make sure that they last for quite some time, then your best best is to clean them regularly. A good practice to execute daily is that when you know that you are finished painting for the day, grab all the brushes you used and give them a good swirl in clean water. Over time, dried pigment within the bristles of your brush can ruin the hairs. Once or twice a month, use a brush cleaner to do a deeper cleaning.
And for heaven’s sake, DO NOT LEAVE YOUR BRUSH SITTING IN YOUR WATER JAR! Brushes that are left in jars with their bristles sitting in water is just a recipe for disaster. Water creeps up the metal ferrule of the brush and breaks down the glue holding the bristles in place. Before you know it, you are painting and small hairs start falling out of your brush. When your brush is not being used, set it down on a cloth to dry on its side.
Learn more about why brush care is so important and how to really take care of them from my previous blog post.
Using cheap watercolor supplies

Okay, hear me out.
I know how incredibly expensive watercolor supplies can be and you can still use the cheaper Canson paper to practice your warm-up brushstrokes on. But if you want to see the your art reach the level of the artists you are swooning over on Instagram, then it is important to start with quality watercolor supplies.
Now, if I had to rank the supplies you should get from the best quality to “so so” quality it would be this:
Paper
Brushes
Paint
I realize I sell our Dot & Dust handemade watercolor paints but I am being completely transparent here. If you want to see a HUGE change in the look of your watercolor art and the quality of your paints that you choose, you need to spend most of your budget on great paper and brushes.
My choices for both? I will always purchase Legion Stonehenge Aqua Coldpress Paper that is 100% cotton and a Princeton Paintbrush. 100% cotton paper is CRUCIAL since the paper soaks the water away from the surface to allow for longer drying times to create those amazing wet-on-wet blooms and bursts (more on this on my blog post here). And a it really doesn’t matter what brush you purchase from Princeton. They are all crazy good but I prefer either their Heritage 4050 or the Aqua Elite line of brushes.
I see so many beginner artists get frustrated with their watercolor art and put all the blame it on their lack of individual skill or technique. But the truth is that it may have nothing to do with the artist’s skill level, and EVERYTHING to do with their cheap watercolor supplies. And if you are skeptical, it doesn’t hurt to try them out and put them to the test. I can almost guarantee you will see a big difference in your work.
Not embracing white space

I see a lot of beginners get frustrated with their watercolor flowers looking like one big blob and not like a flower.
Well here is the secret. You have got to embrace the white space as you paint. What I mean by this is make sure there is a tiny bit of white space from your watercolor paper that shows up between each of your petals and leaves. And I find the white space that is created in the center of each flower is so important because it is here where you can see where each of the petals on your flower originates.
White space can create depth and it can add highlights to your artwork. Use it well to make your artwork come alive and give it movement.
Painting with dirty, muddy water

If you are not careful and end up painting with dirty, muddy looking water, you can transfer that icky color to your painting.
Make sure you are changing out your dirty water jar regularly or do what I do and have one jar to rinse your cool colors and another to rinse out your warm colors. This is easier for me since it prevents my paint colors from looking muddy AND I don’t have to change out the water from my jar too often.
Diving in without doing warm up strokes

When you are about to start an intense exercise or run, you almost always do a little stretch or warm up. This should be the very same for how you approach your watercolor practice.
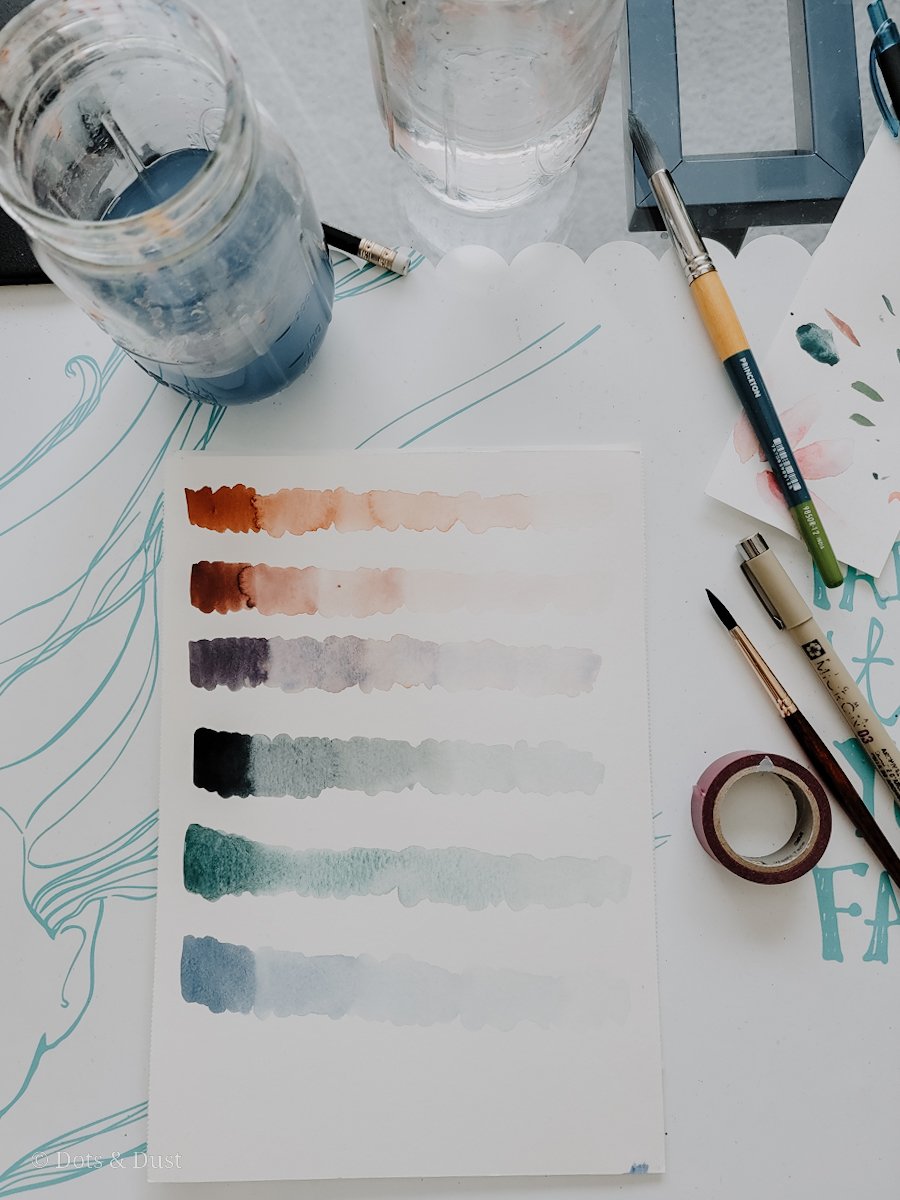
I always have scrap pieces of watercolor paper lying around to swatch colors I want to mix and use that day. And I like to warm up my hands and engage muscle memory by practicing some basic watercolor brushstrokes first. I find that my painting time always feels smoother and my elements look way better when I have taken the time to warm up my had first. It doesn’t matter if you are a beginner or an artist who has been painting for YEARS, take the time to warm up first for the best results.
Using too much water/too little water

Ahhhh, water control.
It has to be one of the most difficult skills to nail when it comes to watercolor. One of the most common mistakes that I see with beginners is either using TOO MUCH water or NOT ENOUGH. It’s a tricky thing to nail and causes a lot of frustration but I promise it is something that gets easier to understand with time.
The best way to avoid having too much water on your paper is this key trick. Anytime you are placing your bristles of your brush into your water jar to lighten a color or rinse a color off, when you lift the brush out of the jar, swipe the bristles on the edge to remove any excess water.
If you look at your brush and see a droplet forming at the tip of your bristles, you have too much water and you need to dab it on a paper towel or cloth.
Avoid any puddles on your paper. Your painting swatches should add a bit of shine to your paper but not puddle and bubble up. Tilt your paper slightly and see if what you just painted looks raised or flat and shiny. Aim for flat and shiny.
For issues with not enough water, practice the “cream to tea” scale. This is important to mastering the right amount of pigment to water ratio that you will need at different times during your practice. Check out my blog post on water control and how to paint a “cream to tea” scale.
Washing off your paint palette all the time

For heaven’s sake, there is absolutely no need to rinse off your paint palettes every time you go to paint.
Now if for some reason you have a ton of muddy, brown or black colors that have formed on your palette and you know you are going to paint something bright, airy and light, then I can see why you’d want to clean off your palette. But if you are painting in the same style with similar colors, then there really isn’t a need to.
What I have noticed the more I experiment is that as long as you keep your warm and cool colors separated, then it is very simple to leave the palette how it is. Think ROYGBIV back when you learned it in grade school. The colors of the rainbow. Keep them in that order on your palette and when you are mixing colors and you’ll be golden.
And the best part about not cleaning off your palette a ton of times? You aren’t rinsing that expensive watercolor paint down the drain. Watercolors are unique that once they dry, you just need to reactivate them with water to start painting again. That means you can leave your paints that you mixed one day and come back the next day to use them again.
Not paying attention to color theory

Color dictates everything we do with watercolor.
It sets the tone. The movement. The feel and mood of a piece.
It is the reason why I find myself swatching color palettes religiously before I start a painting.
What I find with most beginners in watercolor is that they will dive into a painting without any plan for what colors they are using or, more importantly, how those colors will work with one another and then wonder why their end results look a bit off putting.
Color theory is the understanding of how colors work together (or against one another) and how you can use certain colors to bring more movement or vibrancy to a piece. In short, it is essentially a thorough understanding of how to use your color wheel.
You can find many articles and websites that go deep into color theory. Be on the lookout soon for my future blog post on the subject and how I personally use it to elevate the look and feel of my watercolor floral pieces.
Giving up on a painting too soon

Let me just put this out there real quick.
I GUARANTEE YOU. Like, 100% guarantee you. There will ALWAYS be a moment while you are working on a piece that you look at it and think, “Oh heck. This is not going the way I want it to. It looks so awkward and weird!”
It’s what we would all call the piece’s Ugly Phase.
But what I want beginners to understand is that you have to PUSH through the ugly phase and keep painting to get to the “Oh my word. It’s beautiful!” phase.
I always tell my students to take moments throughout their painting practice to pause and look at their piece. I am telling them to pause to assess balance and color composition. But I do not want them to stop painting and give up altogether. Nope. It is crucial to keep painting. It is in those pauses where you can step back and really see where you need to paint next and what elements are dominating. Do you need more filler flowers? Is there too much red on the left side of the painting and now you need to add more to the right? When you stop and give up, you are robbing yourself of learning how to problem solve and vital watercolor experience. And if you fill the entire page and still hate it, I be there is a person out there who you could gift it to and they would absolutely adore it.
So when you get that urge to throw out your work, just don’t. Take a step back, assess it, and add what you feel you need.
You’d be amazed what the end results will be.

Not giving yourself grace to be a life-long learner

And that leads me to my final mistake.
I know for a fact I am frequently guilty of this one. But learn from my mistakes, right? ;)
As human beings, continual growth is the driving force of fulfillment and success. You cannot become the best at what you do without being okay with failures and giving yourself the grace and PERMISSION to become a life-long learner. All of those who are considered the top of their craft will almost always be focused on the journey versus the end result. It’s in those many years of practice, learning, and experimentation that gets them to where they are and continue to be.
Avoid being stagnant and having that “I have been doing it this way for years so why do I need to change that?” mentality.
Play in your practice. Use different brushes. Use different methods. Learn from artists who do things differently than you. Add combinations of other art mediums like gouache and ink to your watercolor paintings.
Experiment and watch yourself grow and find your own unique style.
And there you have it! My ten watercolor mistakes to avoid.
I would love to hear what you think! Did I miss any mistakes or habits to avoid? Have you been guilty of any of these?
The Latest & The Greatest