
How to Paint Watercolor Leaves (The “DPL” Method)
Disclosure: This post may contain affiliate links, meaning, at no additional cost to you, I will earn a commission if you choose to click through and make a purchase.
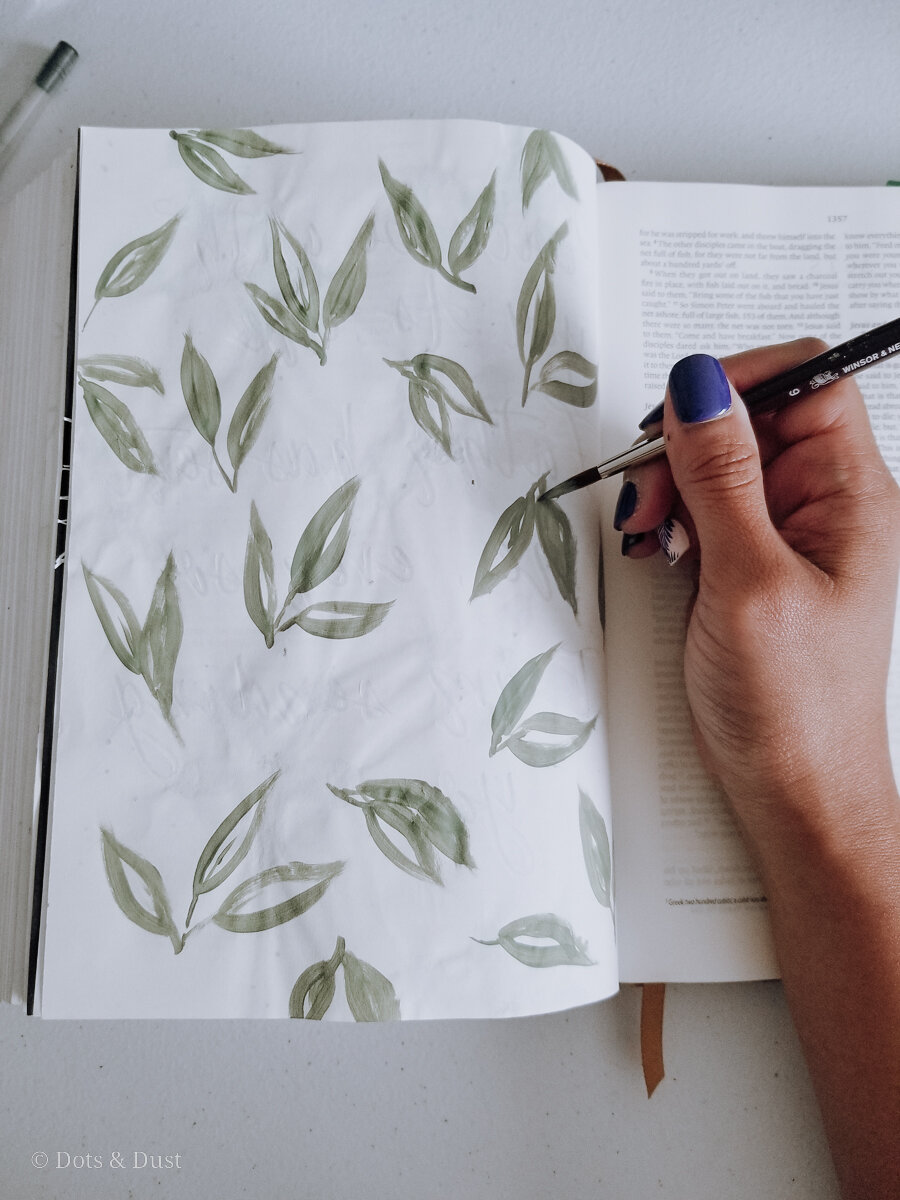
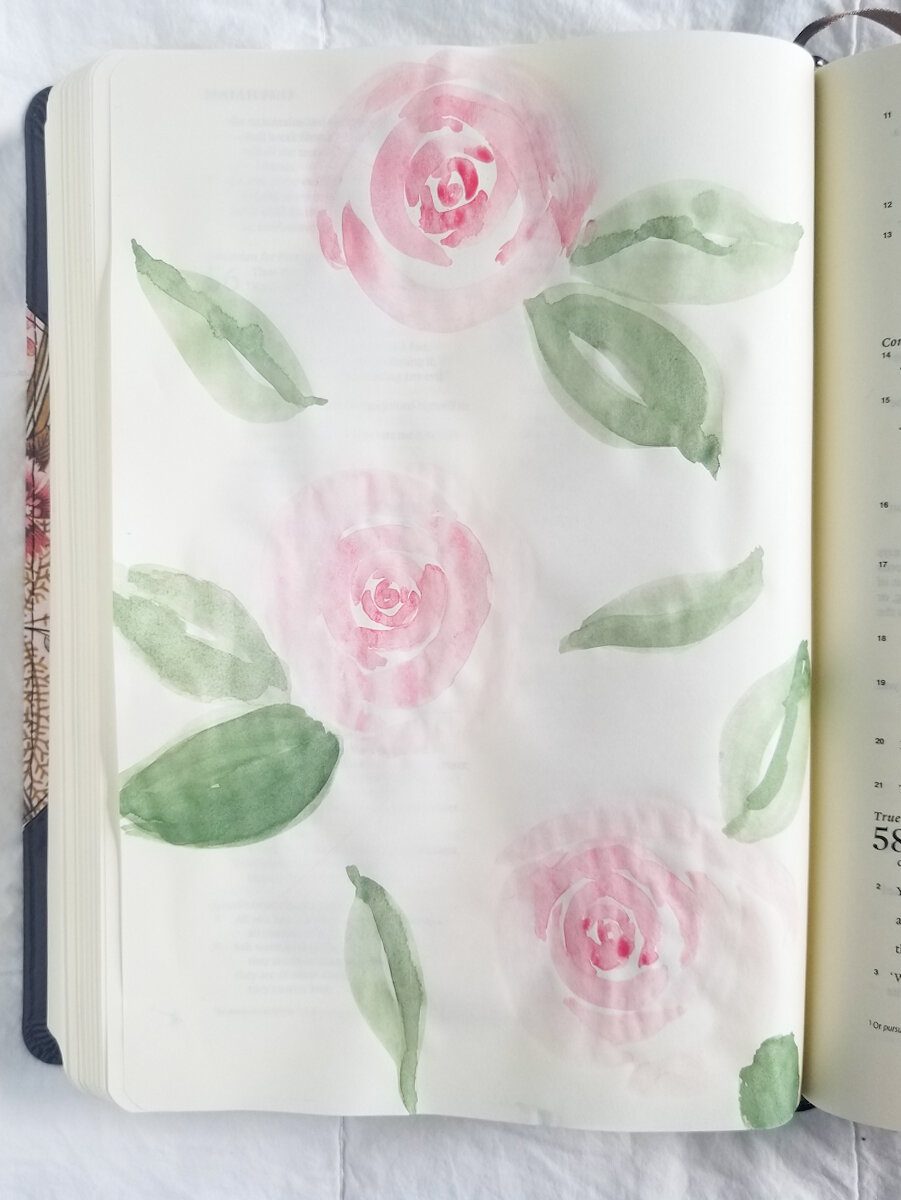
One of my favorite things to paint is watercolor leaves. And today I am going to show you how easy it is to create these beauties using something I like to call the “DPL” method! Best part? Once you learn how to use the “drag-press-lift” method to paint leaves, you can use this new skill to decorate your bible journaling pages, greeting cards, gift wrap, and so much more!
Supplies Needed:
140 lb. Cold Press Watercolor Paper
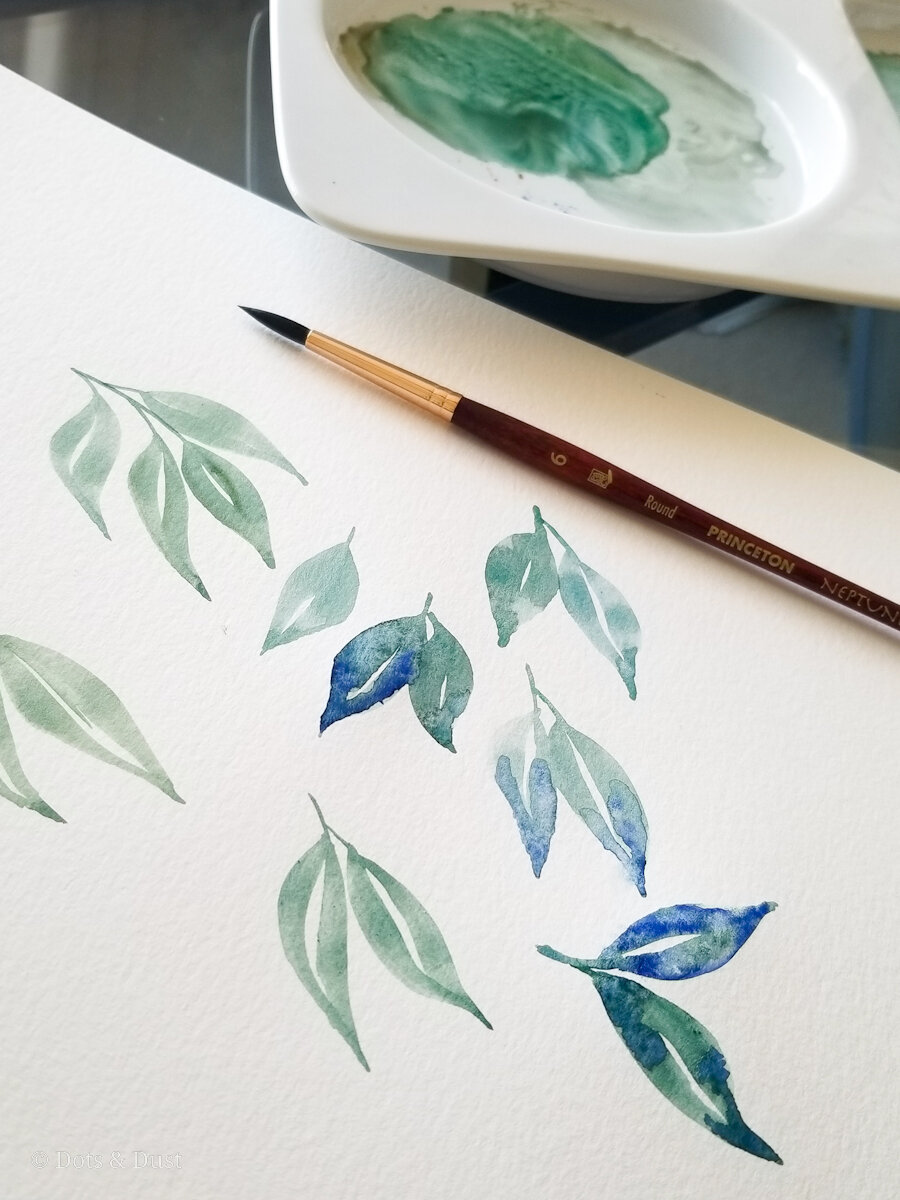
Round watercolor brush in any size you choose. I prefer starting with a size 6 (Princeton Neptune)
Watercolor paint in shades of green & blue (I am using Dots & Dust For Evergreen & Jungle Gym)
Cup of water
Sheet of paper towel or cotton swabs
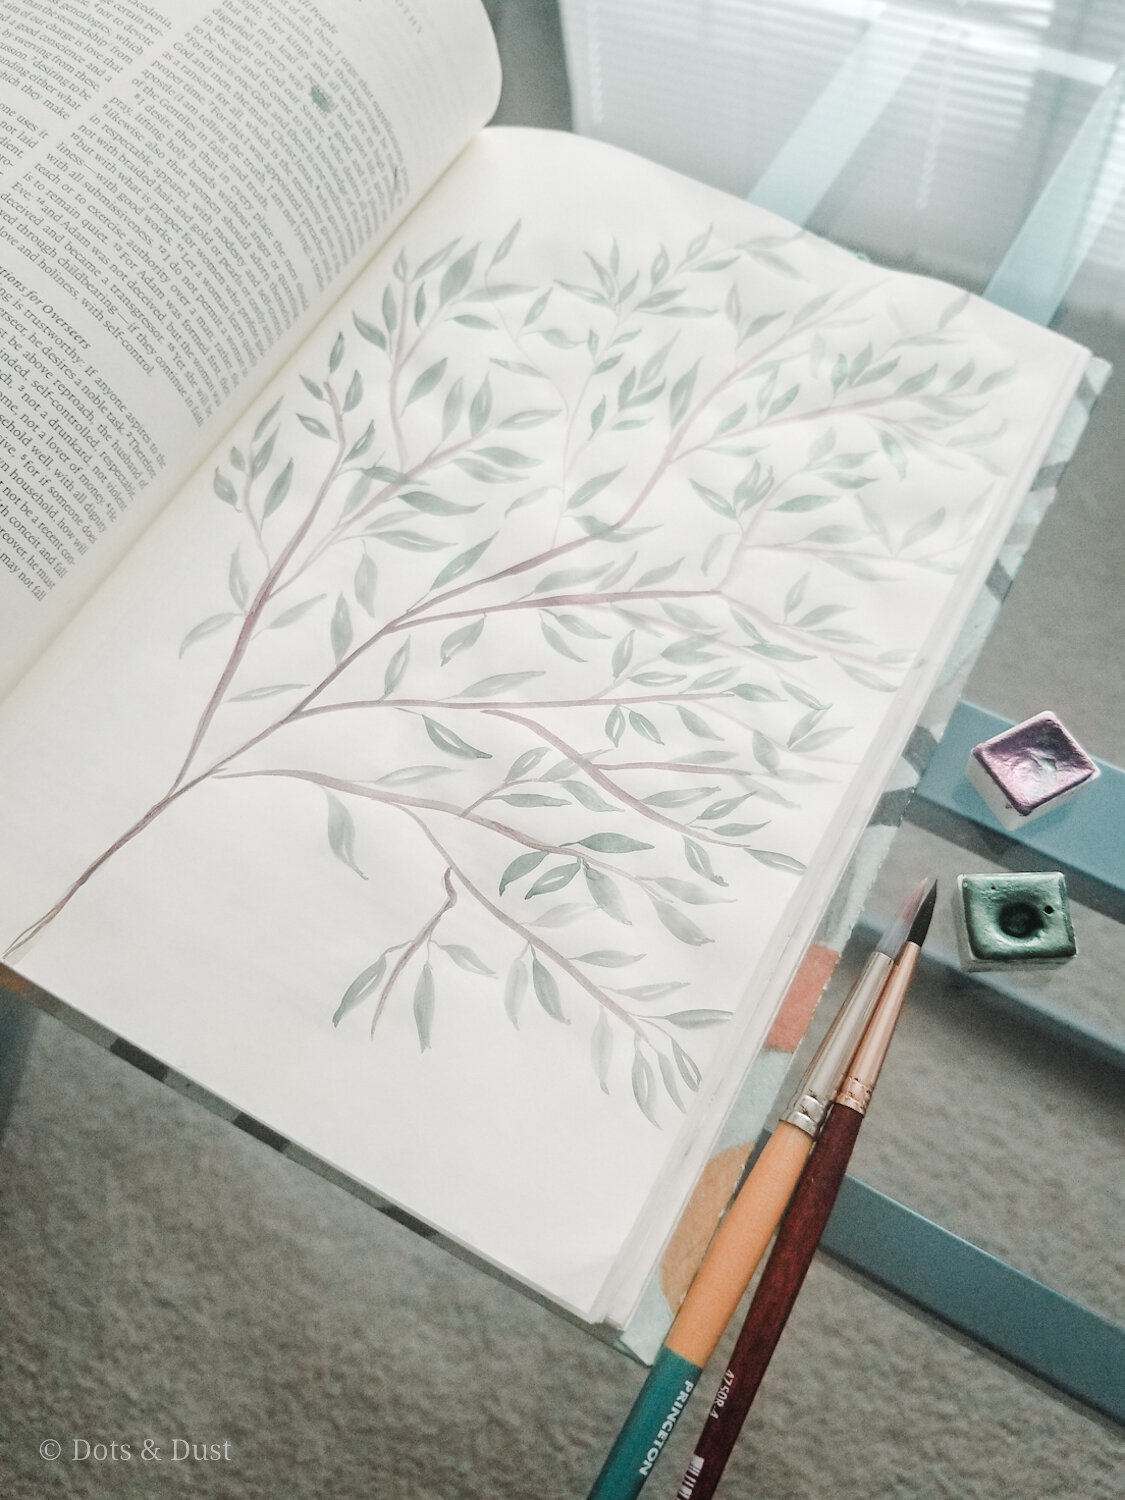
Make sure to always start off by mixing your desired colors on your paint palette to create the hue of your choice. In the video below, you can see I chose to mix For Evergreen & Jungle Gym on a white ceramic plate.
Take your number 6 round paintbrush, load it with clean water, & then dip it into your green paint mixture.
The “drag-press-lift” method. Hold your brush as you would normally hold a pencil (at a 45° angle) and lightly drag the very tip of the brush to create the stem of your leaf. If you are having trouble getting a nice thin stem, then try holding your brush more at a 90° angle from the paper.
Point the paintbrush tip halfway up the length of your stem to start. Then gradually apply pressure by pressing down and then gradually lifting up to a point to create one side of a leaf. Return to the stem of your leaf (this time a little high up the stem) and repeat the same “drag-press-lift” motion to create the other side of your leaf. Note: if it feels too difficult to practice this method painting with upstrokes, then turn your page around and paint using downstrokes from the stem.
Remember that if you leave a bit of white space down the middle of your leaf, that is perfectly fine! It’s actually encouraged as it gives the illusion of a vein on your leaf.
If you want to give your leaves more dimension and interest, you can drop a different color (in the video I am using Jungle Gym) to create interest and depth to your leaves.

Quick tip: if you happen to add too much water or paint to a certain spot of the leaves, just rinse your paintbrush with clean water, dry it off on a paper towel, and use it to lift up the excess paint. The thirsty brush will suck the paint up quickly.
You can also use a paper towel or cotton swab to dab the paint while it is still wet to create illusions of highlights or create more texture.
And there you have it! Remember, that practice makes progress. This method can be a bit tricky but the more you do it, the easier it gets.
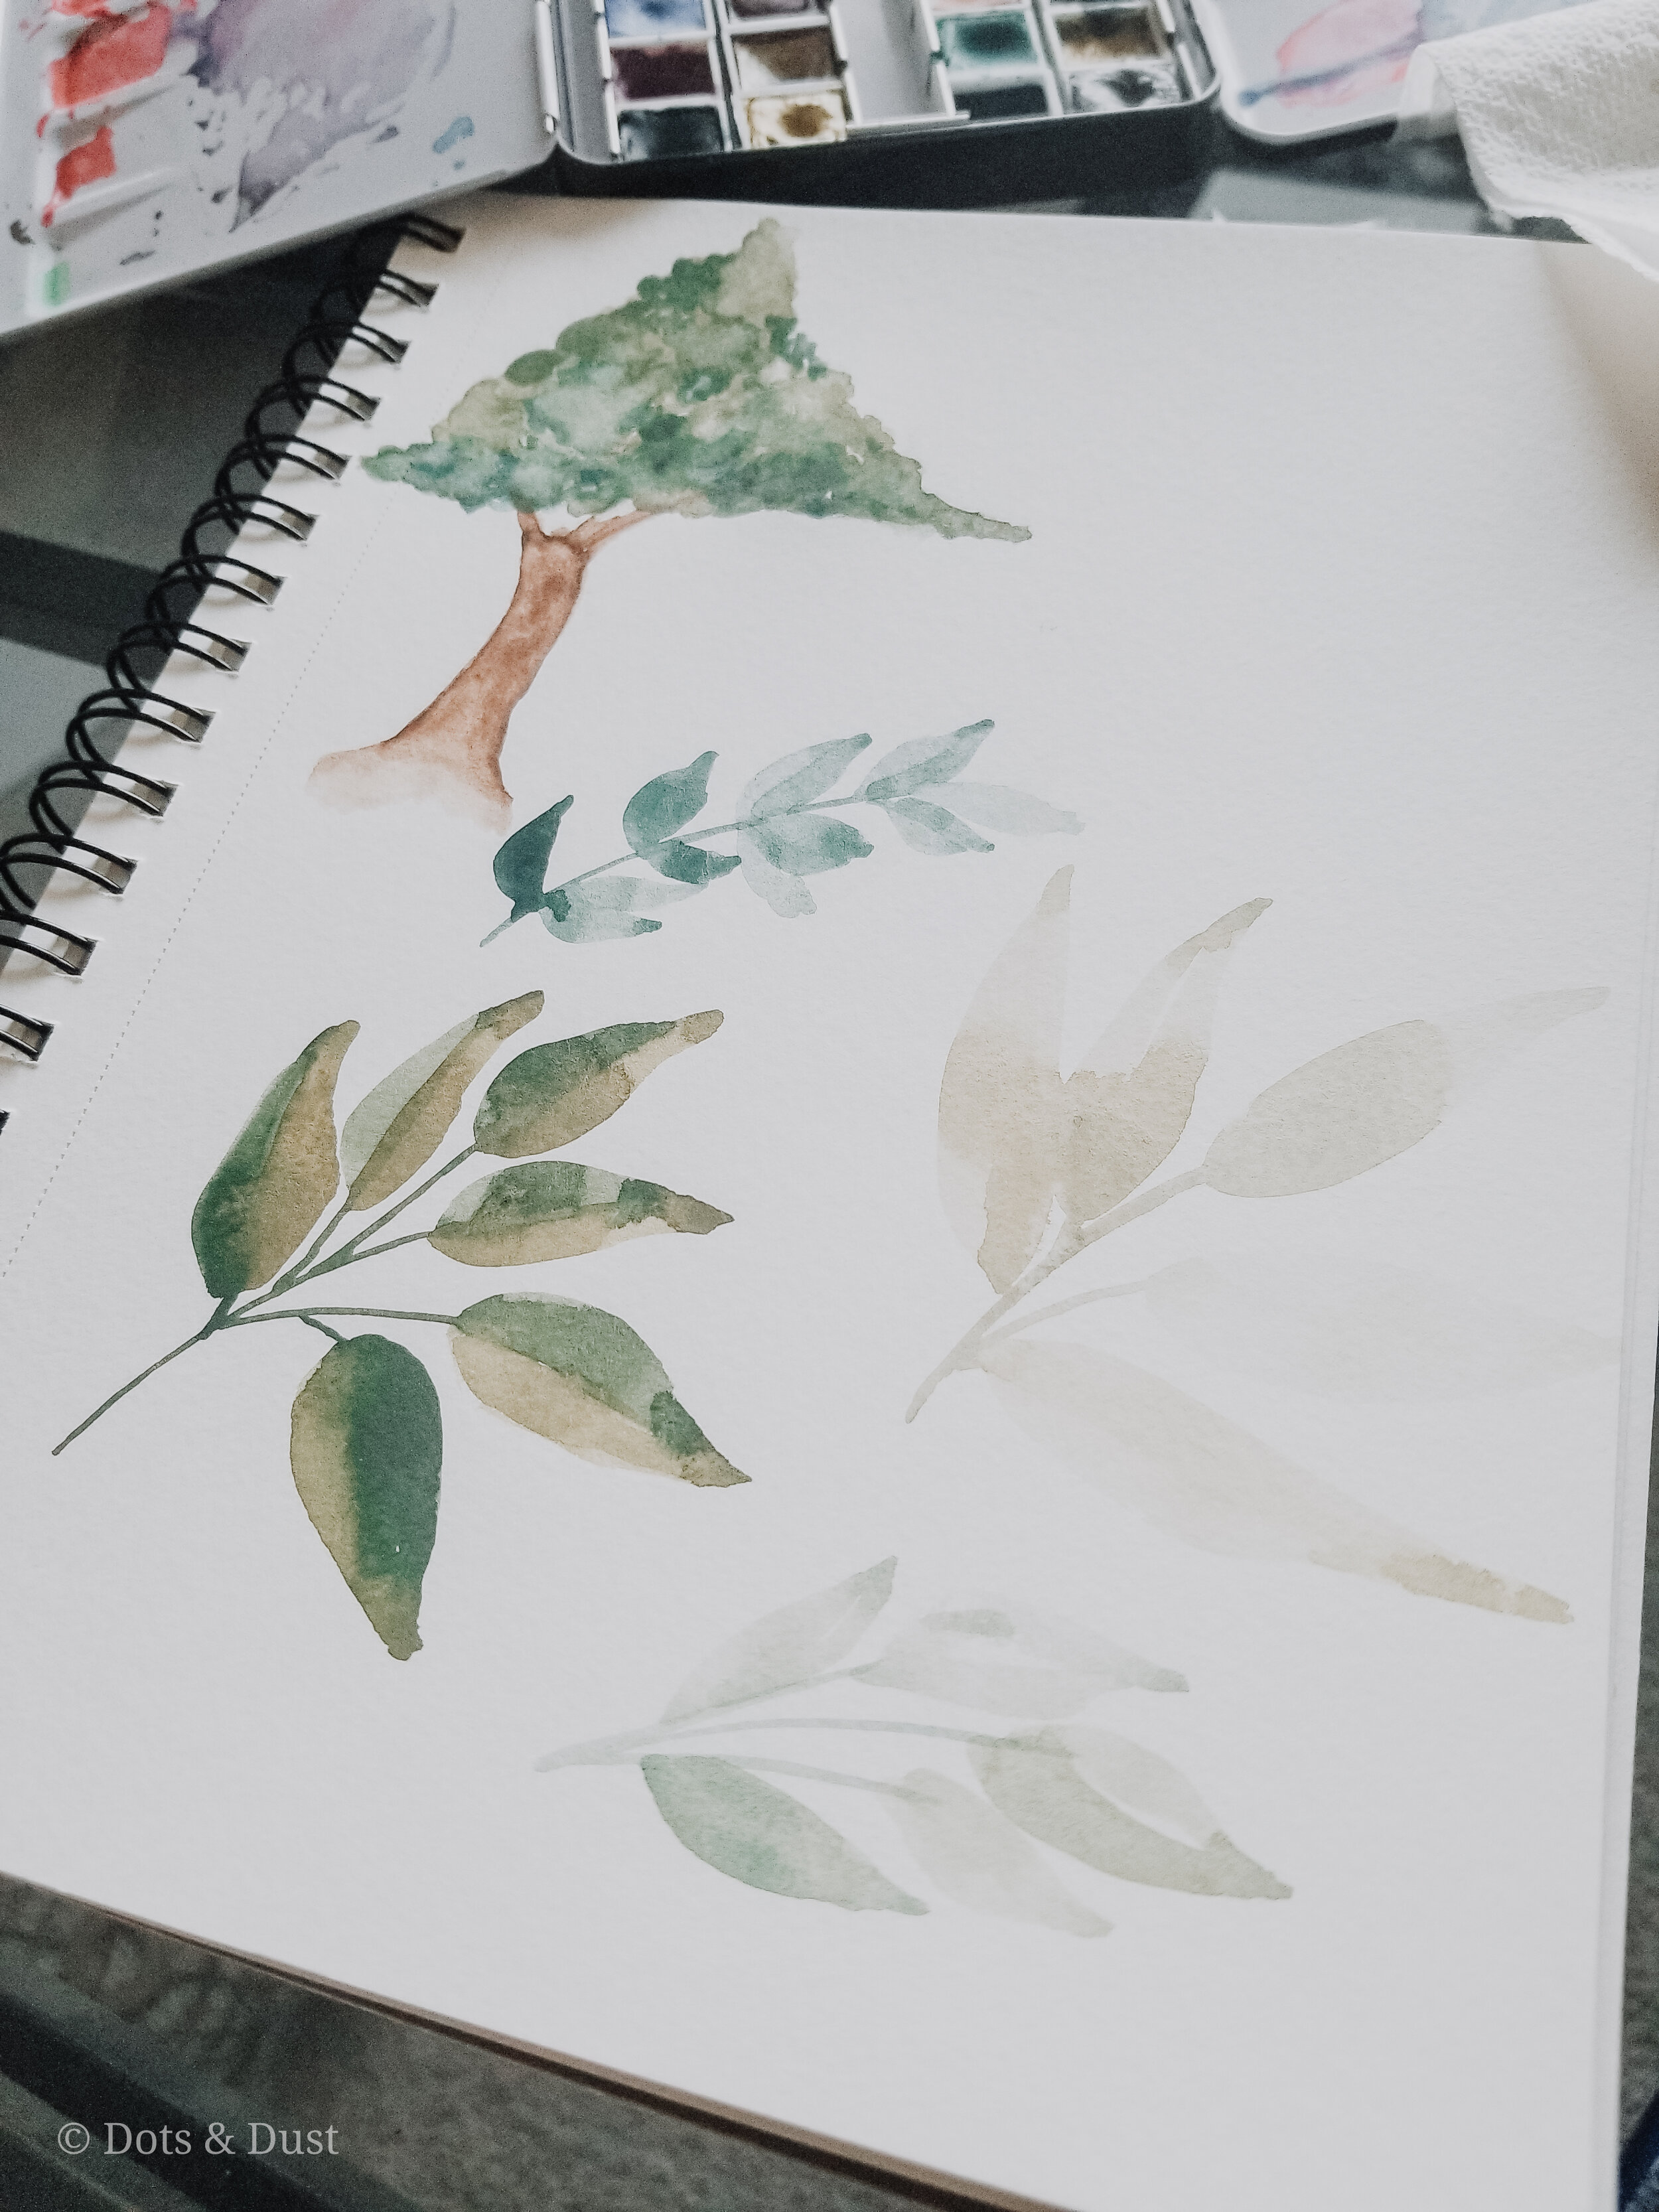
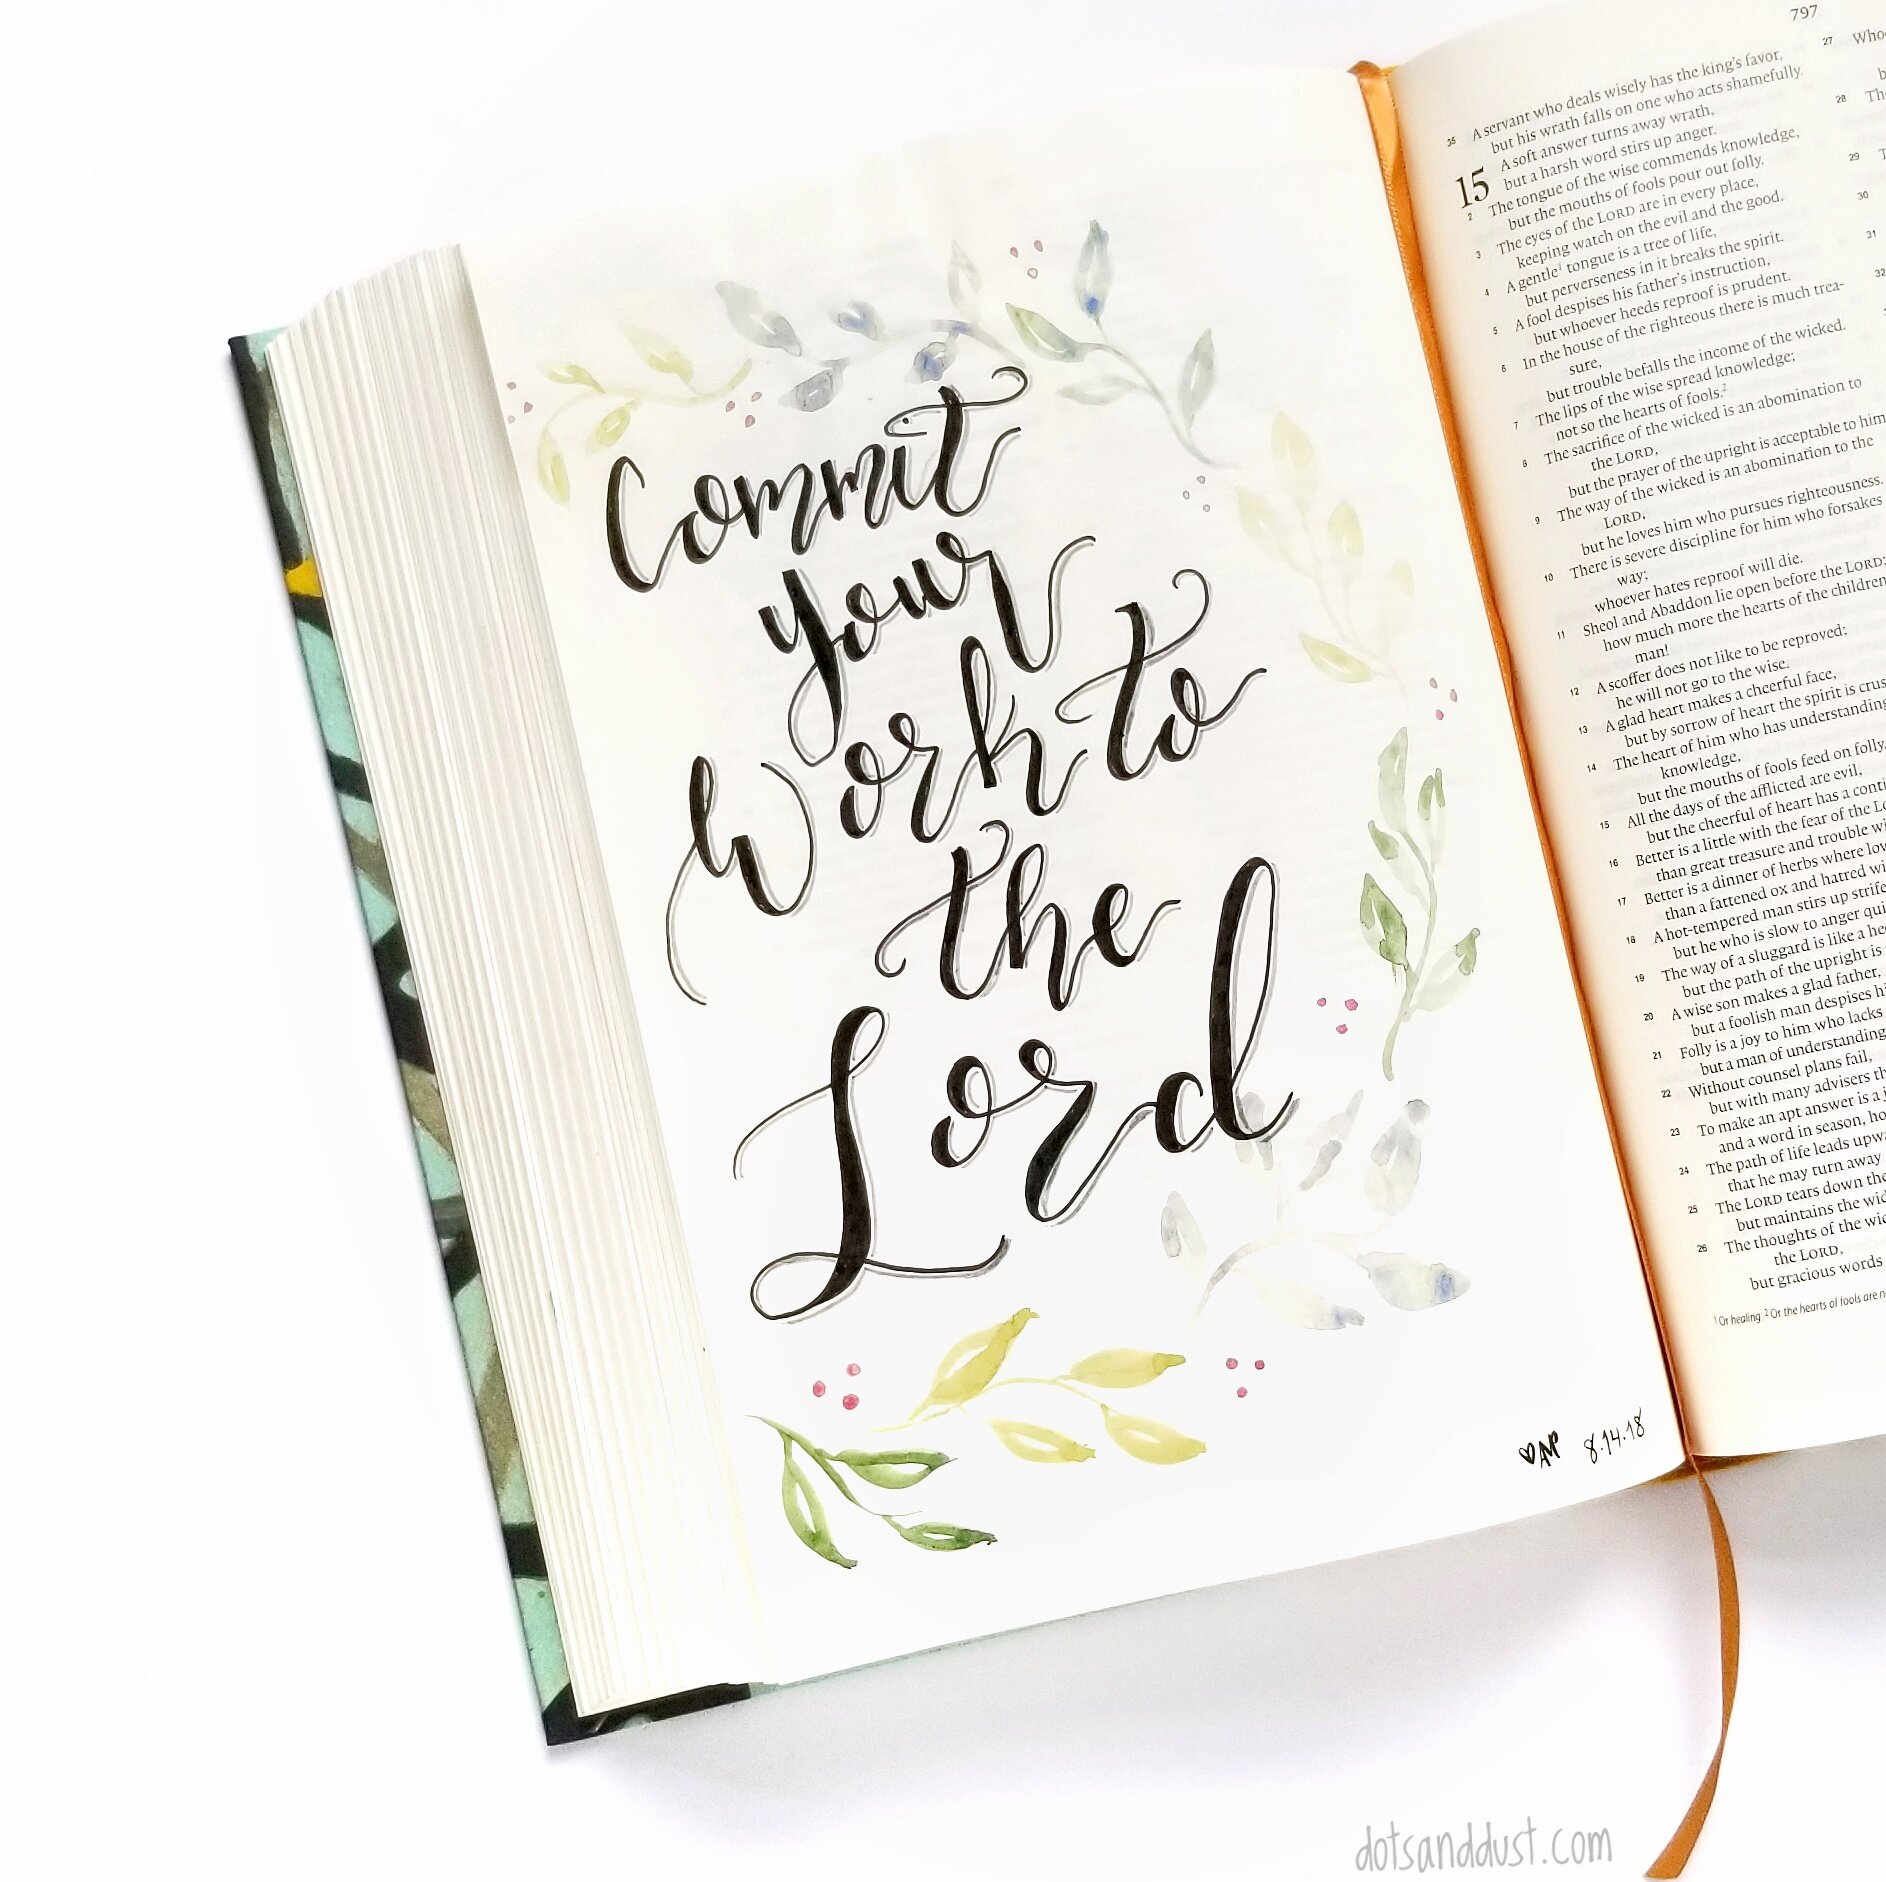
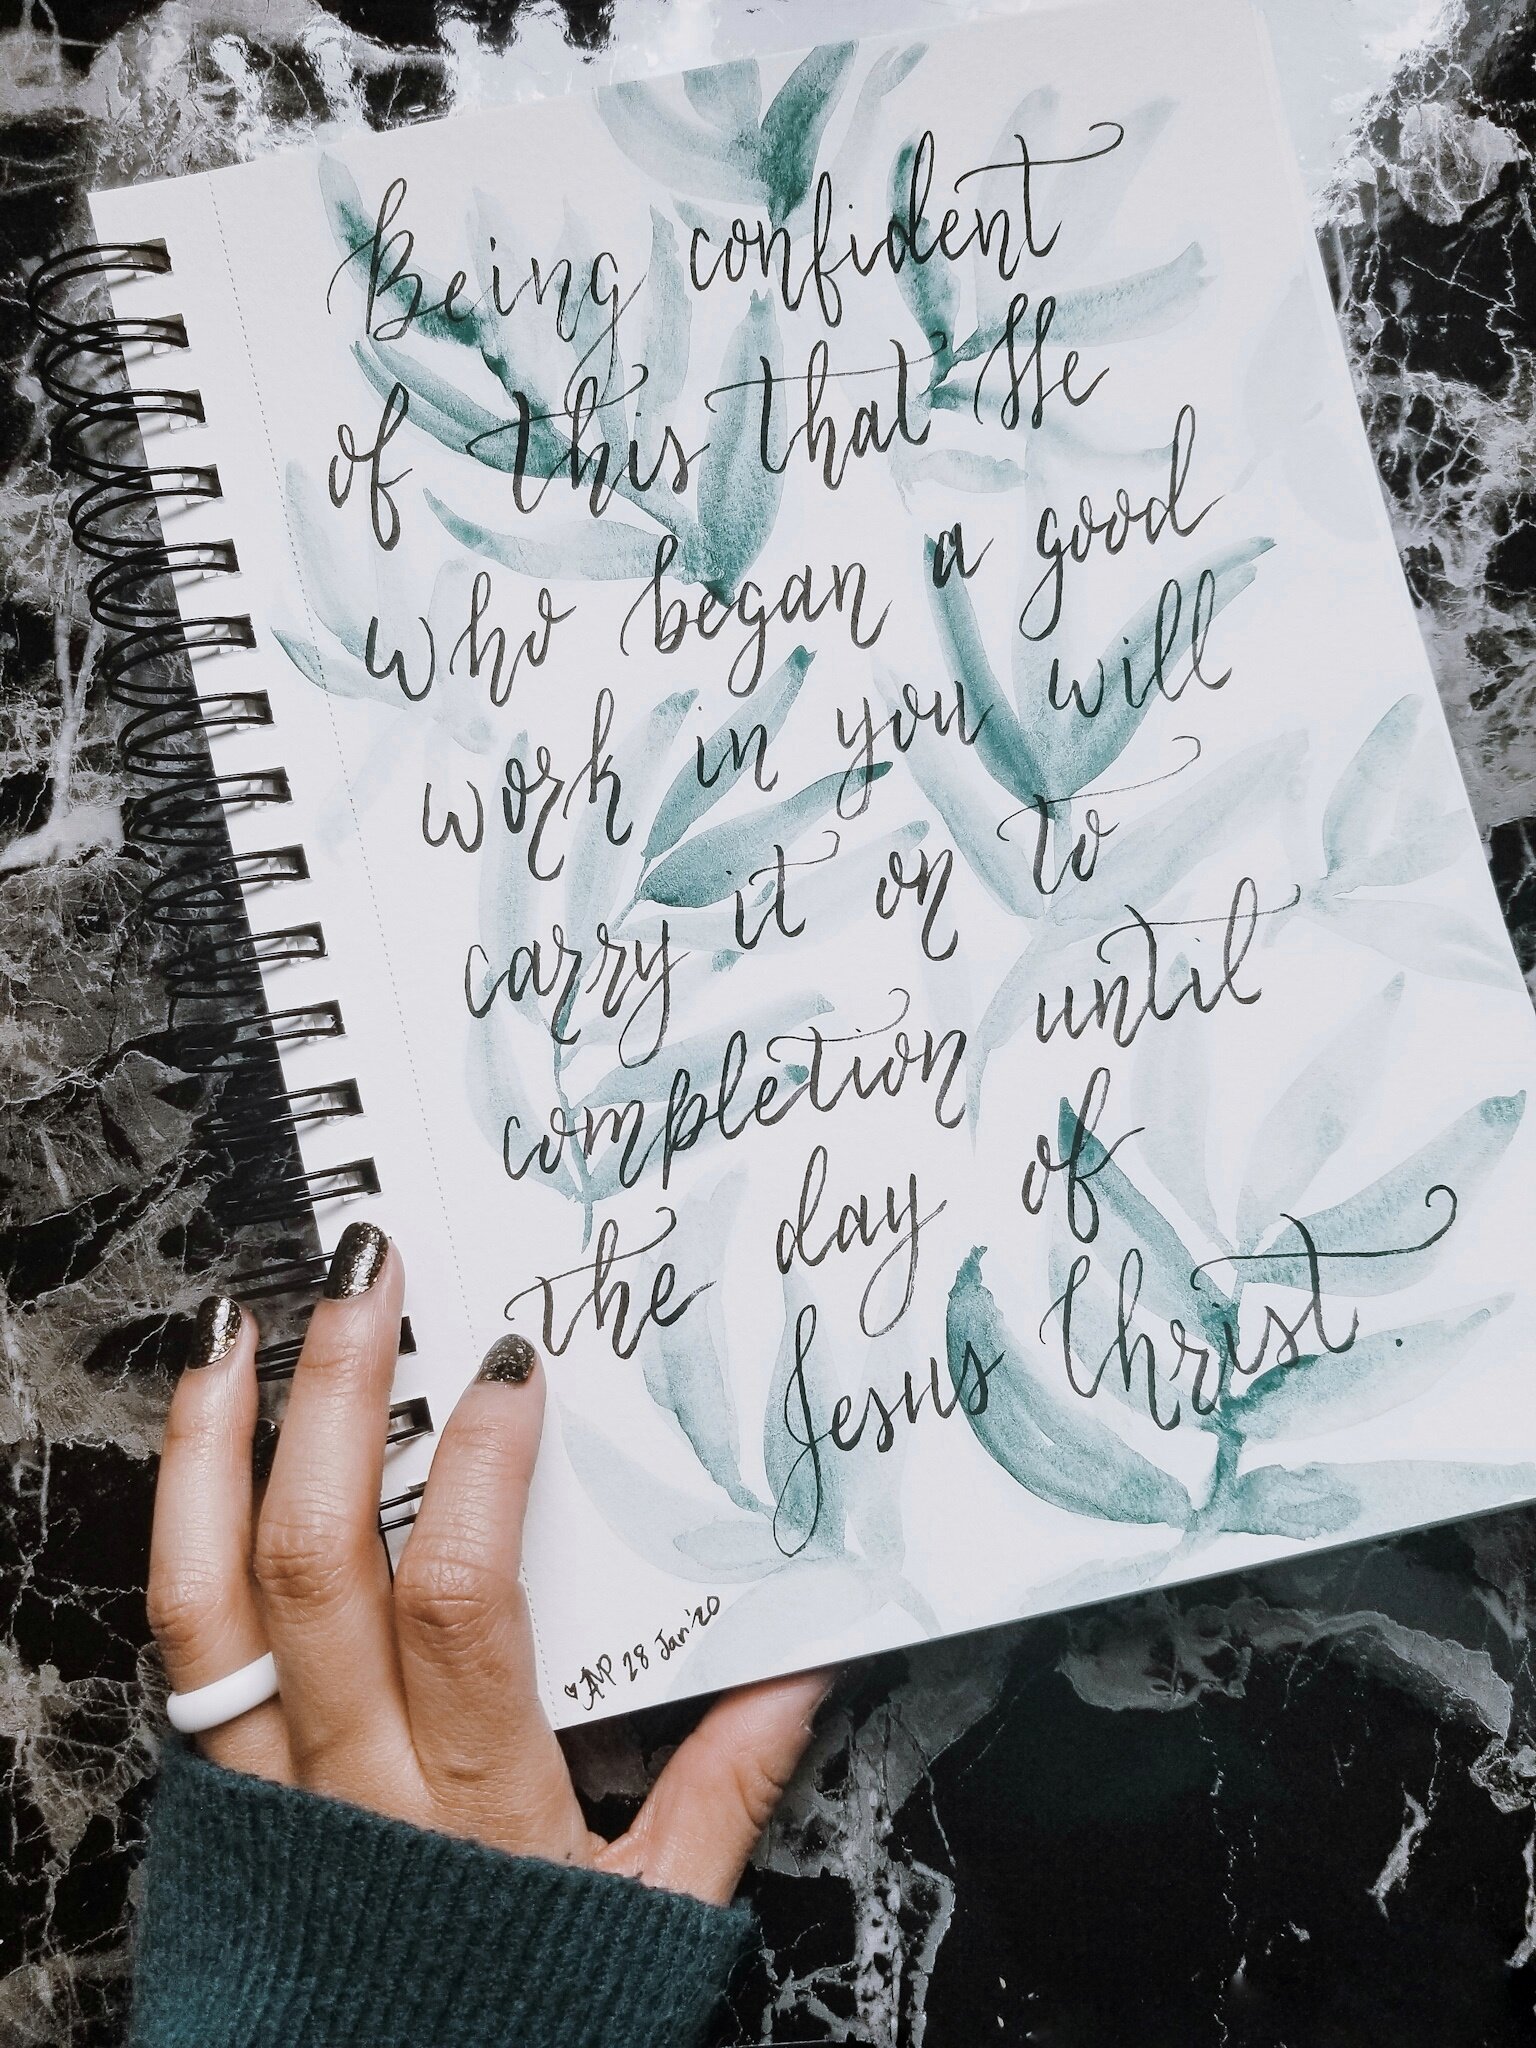
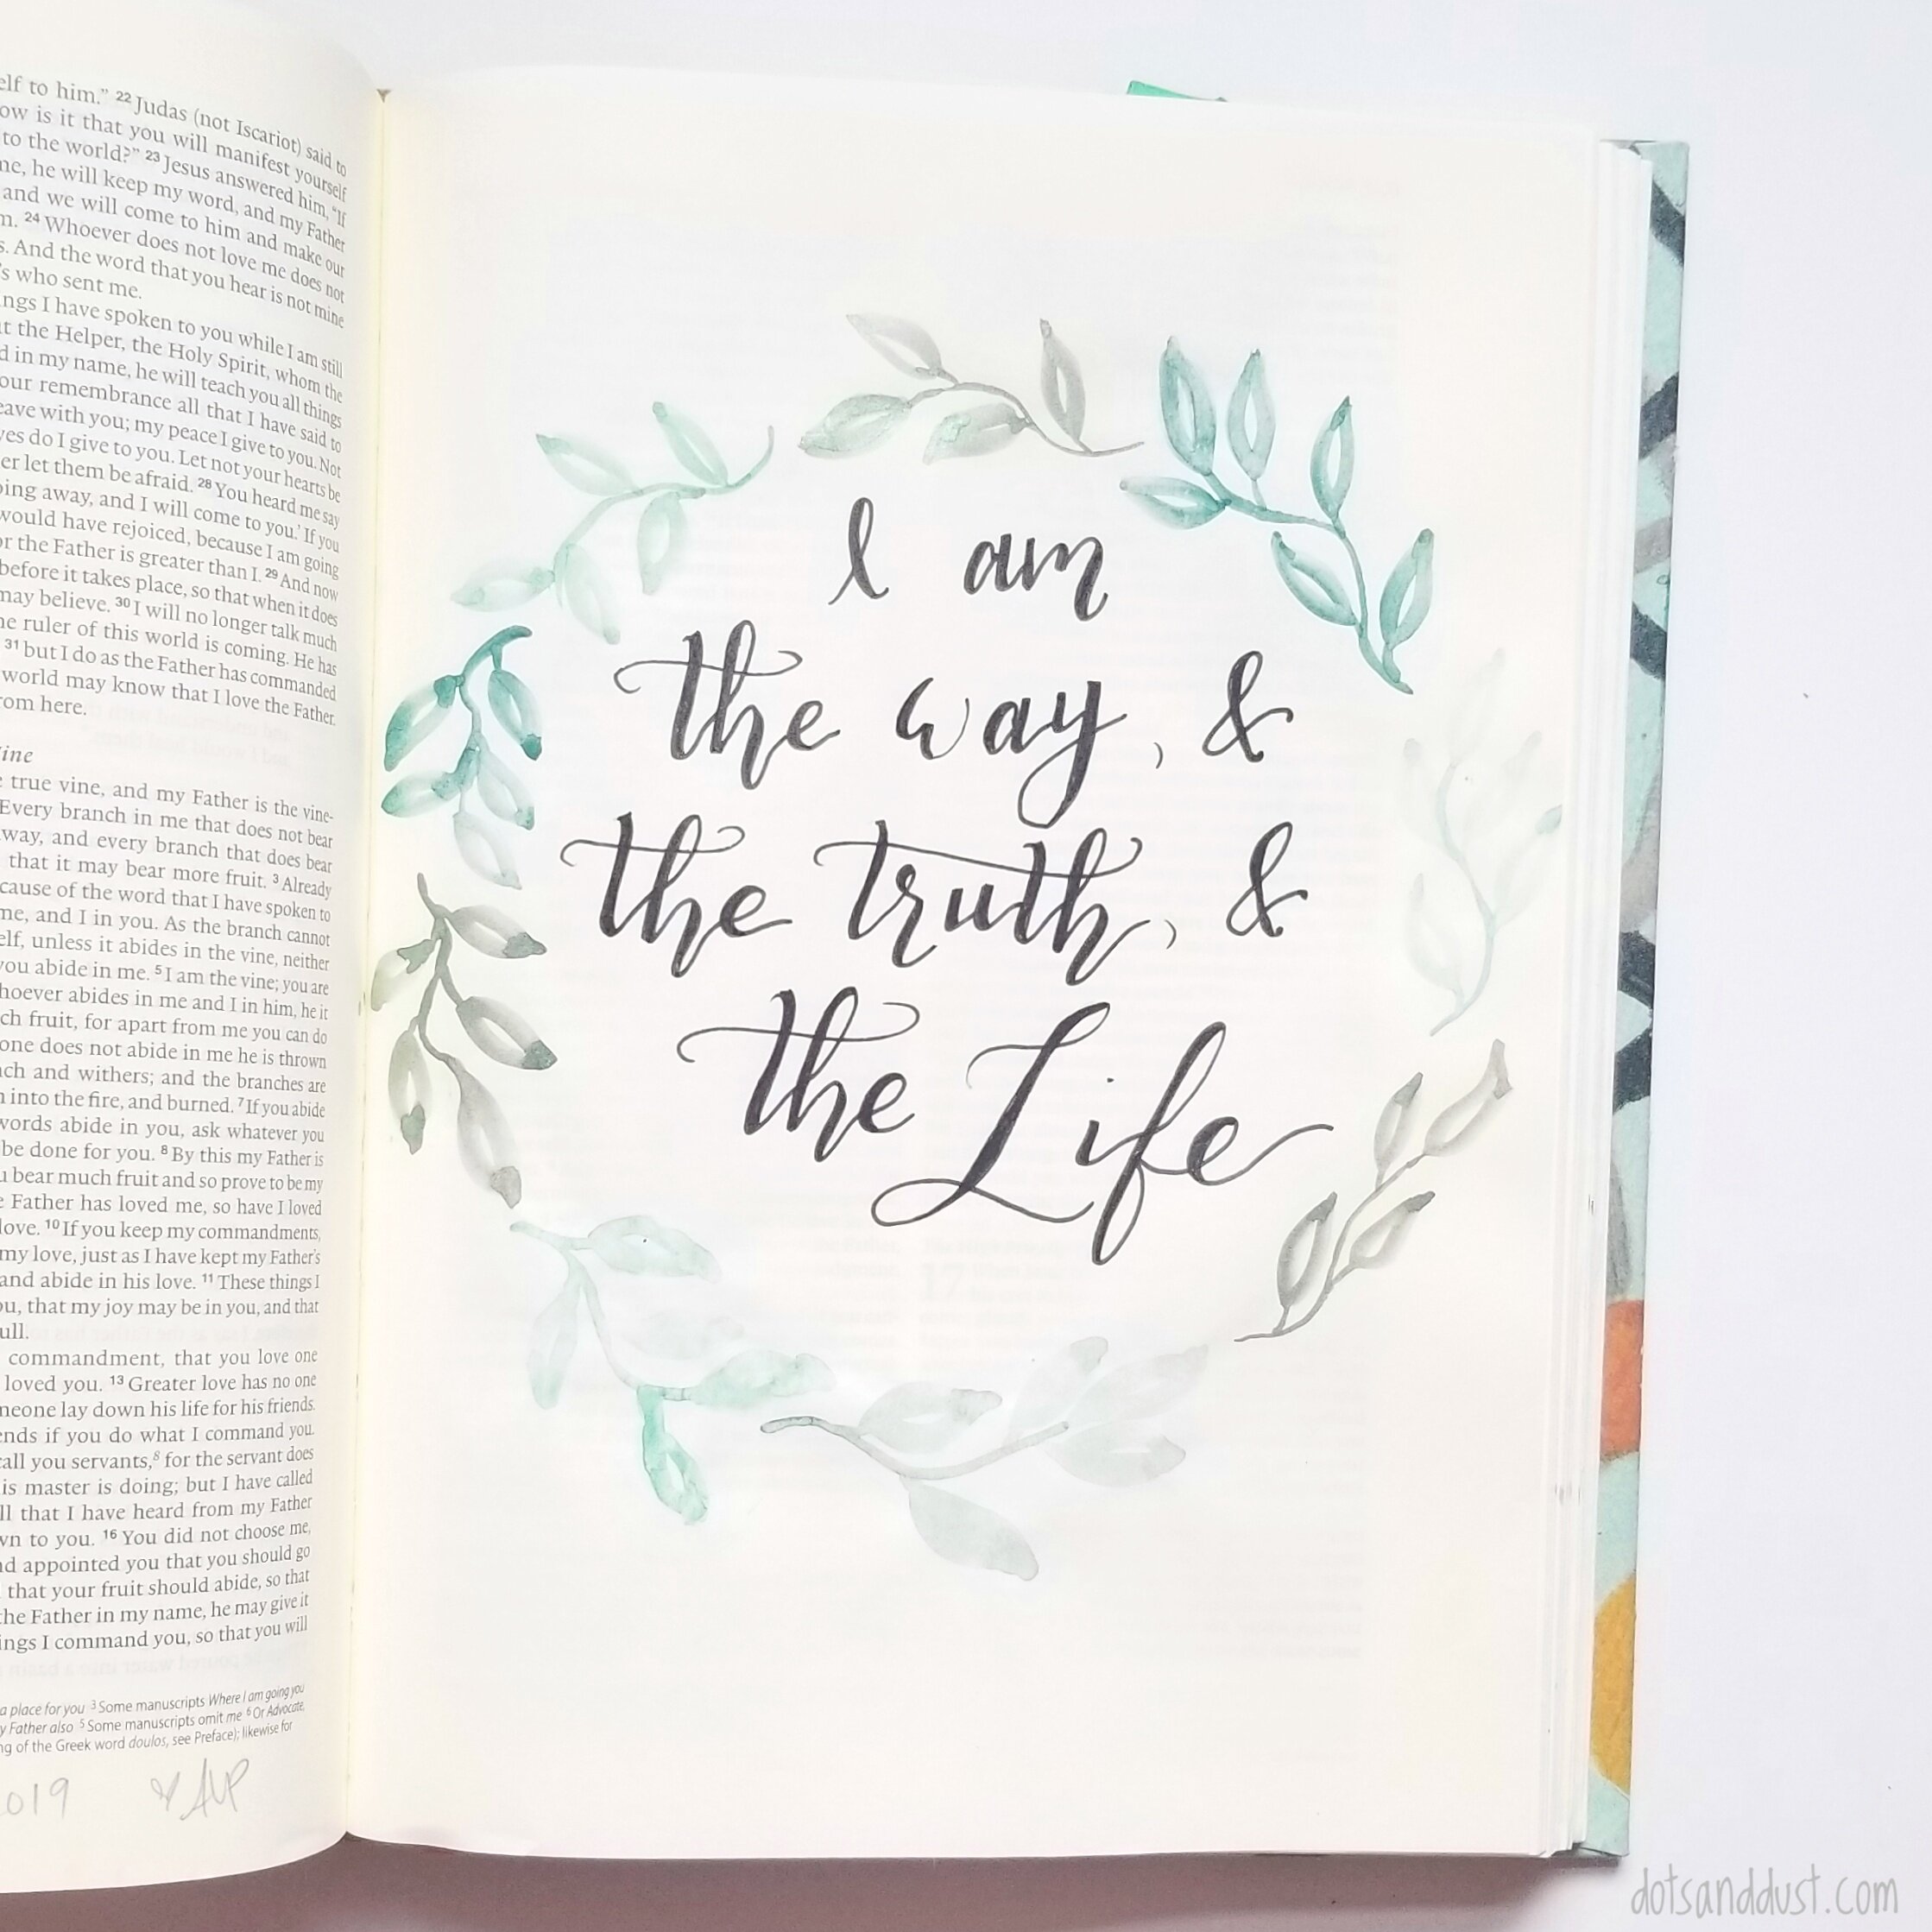
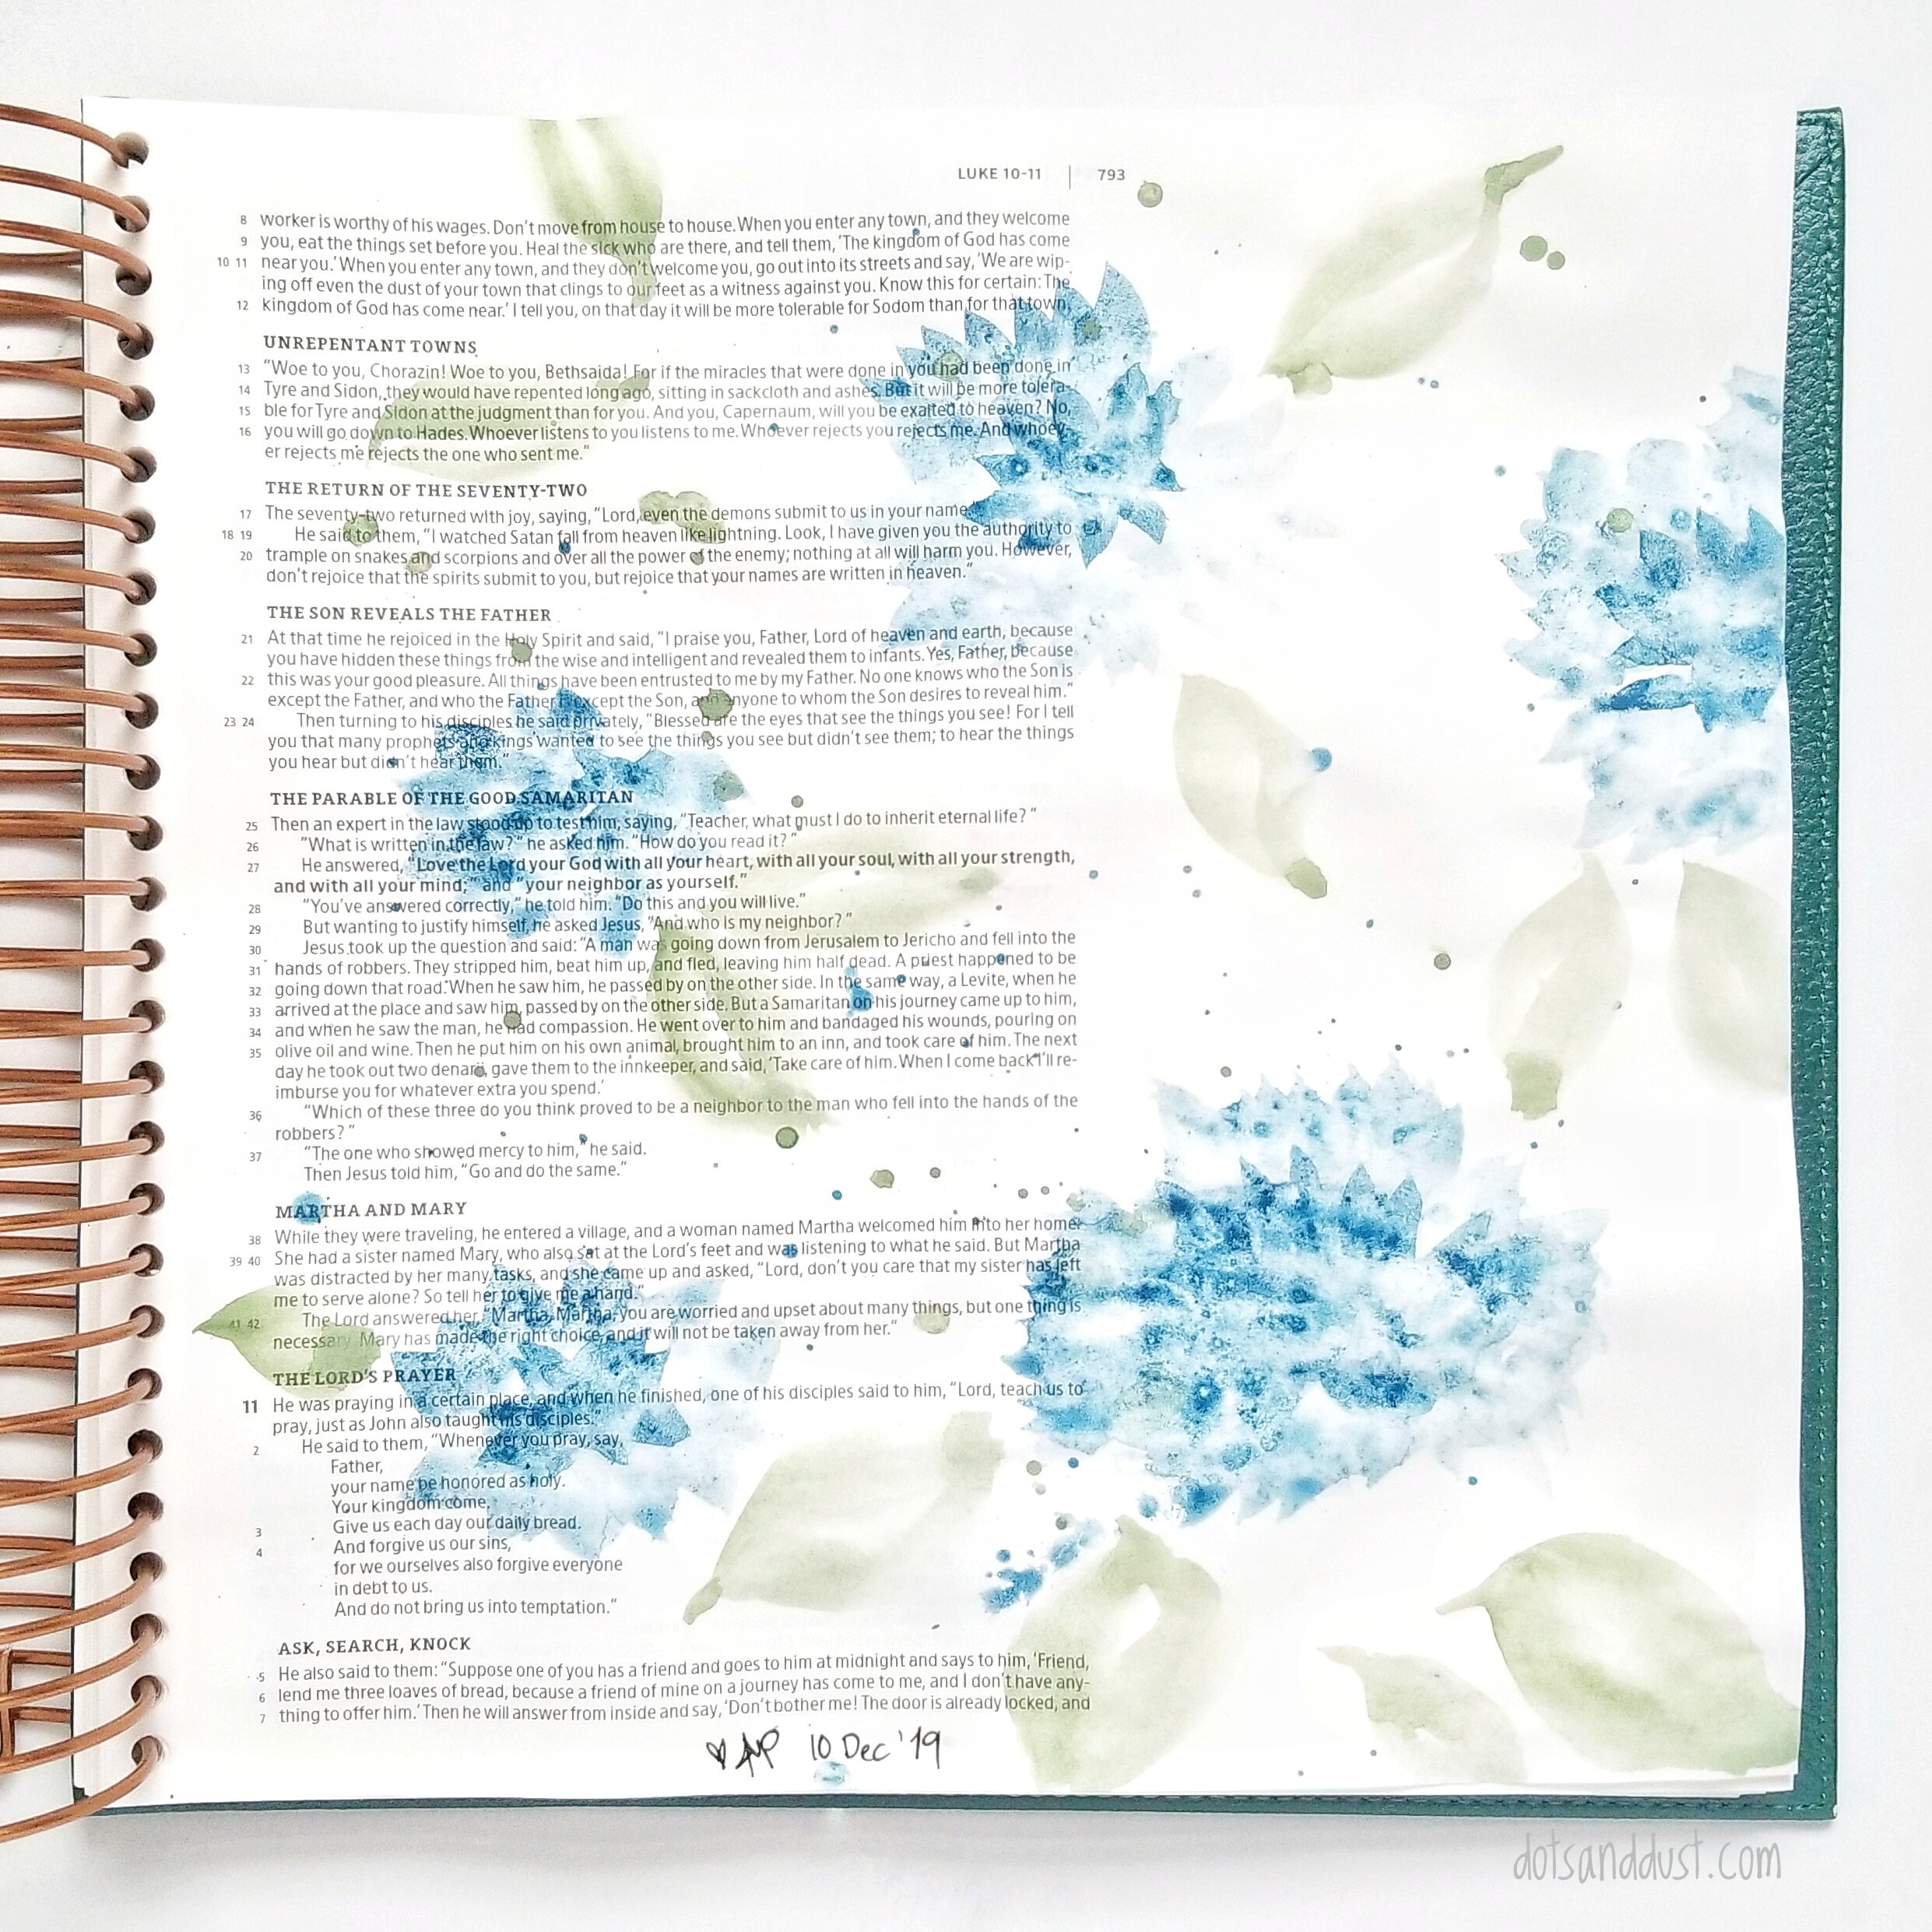
Check out the ways I have used this simple watercolor technique in my past bible journaling and painting projects!
If you happen to try this tutorial out, please be sure to tag us using the hashtag #dotsanddustfam on social media.

Ready to use the “DPL” method in your bible?
Check out this past tutorial!
The Latest & The Greatest